Streamline Your Kitchen Sink Area for Good
Share
You're about to transform your kitchen sink area into a haven of efficiency and style! Start by evaluating your current layout, fixture selection, and color scheme to identify areas for improvement. Next, purge unnecessary items, sorting essentials into purpose-based zones and assigning designated homes for each item. Utilize vertical storage spaces, implement a cleaning schedule, and optimize sink station functionality for a seamless workflow. With these steps, you'll create a sparkling oasis that elevates your cooking experience. Now, take the next step towards a clutter-free haven that's a joy to be in, and discover the secrets to maintaining its shine.
Key Takeaways
• Assess the sink area layout to optimize workflow, focusing on fixtures, space, color scheme, and texture to create a clutter-free aesthetic.
• Purge unnecessary items by identifying and discarding expired products, broken appliances, and dusty decorations to create a sense of calm.
• Sort items by purpose, categorizing essentials into zones, and assign specific homes for each item to streamline the space for ease of use.
• Utilize vertical storage spaces, such as corner shelves and overhead cabinets, to maximize storage and create a sense of openness.
• Implement a cleaning schedule, committing to daily, weekly, and monthly cleaning rituals to maintain a sparkling oasis and prevent clutter buildup.
Assess the Sink Area Situation
Take a step back and survey the sink area, paying attention to the layout, the condition of the fixtures, and the overall flow of the space. You're not just cleaning up, you're evaluating the sink area situation. This is where Sink Psychology comes in – understanding how you interact with your sink and how it affects your daily routine.
Notice how the layout affects your workflow. Do you have to reach too far for soap or towels? Are there any obstacles hindering your movement?
Now, focus on the fixtures themselves. Are they outdated, worn out, or simply not functional? A thorough Space Analysis will help you identify areas for improvement. Consider the color scheme, the textures, and the overall aesthetic. Does the sink area feel cluttered, cramped, or chaotic?
Purge Unnecessary Items Completely
As you stand in front of your kitchen sink, take a good hard look at the clutter that's accumulated around it.
You'll likely spot a jumble of soap bottles, sponges, and scrubbers competing for space, making the area feel cramped and chaotic.
It's time to clear the decks and get intentional about what stays and what goes, so you can create a serene and functional space that sparks joy.
Clear the Clutter Away
Every inch of countertop around your kitchen sink is prime real estate, so start by sweeping away everything that's not essential to your daily routine. You'll be amazed at how much more functional and peaceful your kitchen feels without the clutter. This process is about more than just decluttering – it's about understanding the psychology behind clutter.
Clutter can lead to feelings of anxiety and overwhelm, making it harder to focus on what really matters: serving others.
Take a close look at what's currently taking up space around your sink. Be ruthless – if you don't use it daily, it's probably safe to get rid of it. Here are some common culprits to contemplate:
-
Expired cleaning products: Toss them to avoid confusion and potential harm.
-
Dusty decorations: If they're not bringing you joy, consider donating or storing them elsewhere.
-
Broken appliances: If you haven't fixed them by now, it's time to let them go.
- Piles of paper: Recycle or digitize them to free up physical and mental space.
Sort Items by Purpose
Now that your countertops are clutter-free, categorize the remaining essentials into zones based on their purpose, ensuring each item has a designated home and a reason to stay. This task segregation will create a sense of harmony and functionality in your kitchen sink area.
Group similar items together, such as cleaning supplies, dishware, and food prep tools. This zone creation will help you navigate your kitchen with ease, making meal prep and cleanup a breeze.
As you sort, ask yourself: 'What tasks do I perform most frequently in this area?' and 'What items are essential to those tasks?' Be honest – if you haven't used it in the past month, it's probably safe to let it go. By purging unnecessary items, you'll create a more streamlined space that serves you and your family.
Imagine the satisfaction of having everything you need within arm's reach, with ample counter space to spare. You'll be more efficient, more organized, and more inclined to serve others with a heart full of joy.
Designate a Home
With your zones established, turn your attention to assigning a specific spot for each item within those zones, making sure everything has a designated home where it can be easily retrieved and returned. This is where the magic happens, and your kitchen sink area starts to feel truly organized.
Here are some ideas to get you started:
-
Assign a corner nook for your soap dispenser, scrubber, and sponge, keeping them within easy reach but out of the way.
-
Utilize a hidden cabinet above your sink for storing less frequently used items like cleaning supplies or special occasion dishes.
-
Designate a specific drawer for your dish towels, rags, and oven mitts, keeping them tidy and accessible.
- Choose a specific spot on your countertop for your coffee maker, toaster, or other small appliances, creating a sense of rhythm and flow.
Assign a Home for Each Item
As you gaze at the cluttered kitchen sink area, designate a specific spot for each item, from soap dispensers to scrubbers, to create a sense of harmony and visual calm. This intentional placement is key to maintaining a streamlined space.
To begin, categorize your items into zones, such as 'cleaning supplies' or 'dishwashing essentials.' Within each zone, assign a specific home for each item. Use zone labels to identify each area, making it easy for you and your household members to find what they need.
For instance, designate a specific spot for your soap dispenser, scrubbers, and dish towels. This visual organization creates a sense of calm and makes cleaning up a breeze.
Utilize Vertical Storage Spaces
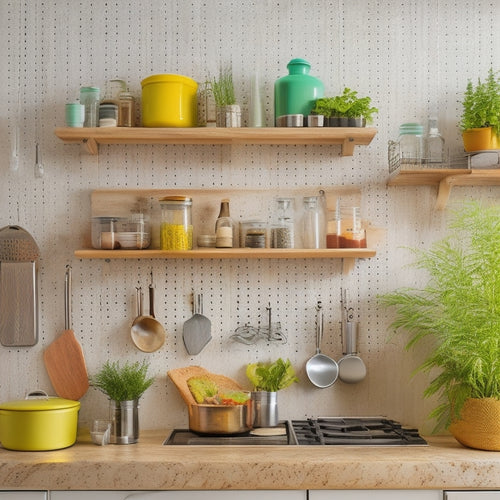
Take advantage of the often-wasted vertical space above your kitchen sink by installing shelves, hooks, or a pegboard to maximize storage capacity and keep essential items within easy reach. This won't only declutter your countertops but also create a more organized and visually appealing space.
Here are some ideas to get you started:
-
Corner Shelves: Install corner shelves to store infrequently used items like special occasion dishes or cookbooks. This will keep them out of the way but still accessible.
-
Overhead Cabinets: Consider installing overhead cabinets above your sink to store items like cleaning supplies, linens, or kitchen gadgets.
-
Pegboard: Hang a pegboard on the wall and attach hooks, baskets, or bins to store items like utensils, spices, or oils.
- Magnetic Board: Install a magnetic board on the side of a cabinet or fridge to store small metal items like spices, oils, or frequently used utensils.
Implement a Cleaning Schedule
As you stand in front of your newly organized kitchen sink area, you're probably excited to keep it looking its best.
To maintain this sleek space, you'll want to establish a cleaning routine that tackles both daily messes and deeper grime.
Daily Cleaning Tasks
Designate a specific time slot each day to wipe down the sink basin, faucet, and surrounding countertops, ensuring a sparkling clean kitchen sink area that exudes freshness and hygiene. By incorporating this habit into your morning routine, you'll set the tone for a clean and organized day.
Here's a daily cleaning checklist to help you maintain a spotless kitchen sink area:
-
Wipe down the sink basin: Remove any food particles, soap scum, or water spots that may have accumulated overnight.
-
Clean the faucet: Use a gentle cleanser and a soft cloth to remove any mineral deposits or water spots.
-
Dust and clean surrounding countertops: Remove any crumbs, spills, or debris that may have accumulated, and wipe down the countertops with a gentle cleanser.
- Dry the area: Use a clean towel to dry the sink basin, faucet, and countertops, preventing water spots from forming.
Scheduled Deep Cleaning
By allocating a specific day and time each week or month, you can commit to a deeper cleaning of your kitchen sink area, tackling stubborn stains, mineral deposits, and grime buildup that daily maintenance can't reach. This scheduled deep cleaning will transform your sink area into a sparkling oasis, perfect for food preparation and social gatherings.
To determine your ideal cleaning frequency, consider your household's usage and needs. If you have a large family or entertain frequently, you may need to deep clean every week. For smaller households, a monthly or bi-monthly schedule might suffice. Be flexible, and adjust your schedule as needed.
As the seasons change, incorporate a seasonal refresh into your deep cleaning routine. Update your sink area's decor, replacing worn-out accessories with fresh, vibrant ones. This won't only enhance the aesthetic appeal but also create a sense of renewal and rejuvenation.
Optimize Sink Station Functionality
What's the most efficient way to arrange your sink station's essential tools, like soap dispensers, scrubbers, and sponges, to create a seamless workflow? By optimizing your sink station's functionality, you'll be able to serve others more efficiently and effectively.
Here are some tips to get you started:
-
Ergonomic Design: Position your soap dispenser at a comfortable height to avoid straining your back or shoulders.
-
Task Automation: Install a touchless faucet or a sensor-activated soap dispenser to minimize manual effort.
-
Consider a slide-out sponge holder or a built-in scrubber tray to keep your sink area clutter-free and organized.
- Designate a specific zone for cleaning supplies, such as a caddy or a basket, to keep them within easy reach.
Maintain the Streamlined Space
To keep your newly optimized sink station running smoothly, commit to regular cleaning and organization rituals that maintain the clutter-free zone you've created. Establish a daily routine where you wipe down the sink and faucet after each use, and take a few minutes to tidy up any clutter that's accumulated. This habit formation will become second nature, ensuring your space stays organized and functional.
As you maintain your sink station, hold yourself accountable for keeping it clutter-free. Assign a specific day and time for deeper cleaning, such as scrubbing the sink and faucet, and restocking soap and other essentials. This personal accountability will help you stay on track and prevent clutter from building up again.
Visualize your newly streamlined space and take pride in the effort you've put into creating it. By maintaining this space, you're not only keeping your kitchen organized, but also creating a more enjoyable cooking experience for yourself and others.
Frequently Asked Questions
How Do I Prevent Water Spots on My Sink After Cleaning?
Just like a photographer shields their lens from raindrops, you can shield your sink from water spots by drying it thoroughly after cleaning, and applying a water-repellent coating for spot prevention - a spotless finish awaits!
Can I Use a Dish Rack With a Farmhouse Sink?
You're considering a dish rack with your farmhouse sink, but wonder if it'll fit. Place the rack near the sink's edge, ensuring it doesn't obstruct the apron front; this stylish combo will elevate your kitchen's functionality and aesthetic.
What Is the Best Material for a Kitchen Sink Organizer?
When choosing a kitchen sink organizer, you'll want a material that balances sink durability with material aesthetics. Opt for a sturdy, rust-resistant metal or a sleek, easy-to-clean silicone that complements your sink's style and your serving spirit.
How Often Should I Replace My Kitchen Sink's Faucet Filters?
'As you turn the faucet handle, imagine a invigorating oasis, but clogged filters can turn it into a stagnant swamp. You should replace them every 3-6 months for best faucet maintenance, ensuring filter quality and a sparkling clean sink area.'
Are Overmount Sinks Harder to Clean Than Undermount Sinks?
You'll notice that overmount sinks, with their visible edges, trap crumbs and dirt, making cleaning more challenging compared to undermount sinks, which seamlessly blend with countertop edges, offering a sleek, easy-to-clean surface, regardless of mounting options.
Related Posts
-

Stylish Pegboard Storage for Open Kitchen Concepts
Stylish pegboard storage can completely enhance your open kitchen concept, merging practicality with contemporary fla...
-

Space-Saving Tiered Racks for Kitchen Storage
Space-saving tiered racks are your best solution for maximizing kitchen storage. They employ vertical space, allowing...
-

Space-Efficient Dish Racks for Tiny Homes
Space-efficient dish racks are a game changer for tiny homes. By utilizing vertical storage, you can free up signific...


