Simplify Your Kitchen: Essential Utensil Organization Tips
Share
To simplify your kitchen, start by purging and categorizing your utensils, separating them into "keep," "donate," and "discard" piles. Then, assign a home for each item, grouping similar utensils together and using color coding to differentiate between categories. Utilize vertical storage spaces, like hooks and baskets, to free up counter space. Optimize your drawers with dividers and categorize utensils by function. Create a utensil station hub with frequently used items and label your storage for easy identification. By implementing these essential utensil organization tips, you'll be cooking up a storm in no time - and there's even more to discover to take your kitchen to the next level.
Key Takeaways
• Purge and categorize utensils by function, frequency of use, and type to create a decluttered and organized kitchen space.
• Assign a home for each item, using color coding, drawer dividers, and vertical storage to ensure easy access and visibility.
• Optimize drawer organization by categorizing utensils into groups, using dividers, and implementing a color-coding system for quick identification.
• Create a utensil station hub on the countertop with frequently used items, including an utensil holder, spice rack, and recipe stand.
• Label and sign storage compartments to ensure quick identification and maintain the organized system with regular cleaning and decluttering.
Purge and Categorize Utensils First
Purge your utensil collection by getting rid of broken, rusty, or duplicate items that are no longer serving a purpose. It's time to declutter and make room for what's truly useful. Go through your drawers and cabinets, and separate items into three piles: keep, donate, and discard. Be honest with yourself – if you haven't used it in the past year, it's probably safe to let it go. Consider donating unused utensils to local charities or thrift stores, where they can benefit those in need.
Next, sort your remaining utensils by function. Group similar items together, such as baking utensils, cooking utensils, and serving utensils. This will make it easier to find what you need when you need it. You can also categorize items by frequency of use, keeping your most-used items in easy-to-reach locations.
Assign a Home for Each Item
Now that you've purged and categorized your utensils, it's time to assign a specific place for each item, ensuring everything has a designated spot where it can be easily found and returned. This step is vital in maintaining your newly organized kitchen.
Start by grouping similar items together, such as all your baking utensils or cooking tools. Then, identify the most convenient location for each group, considering the frequency of use and the workflow in your kitchen.
Use color coding to differentiate between categories, making it easier to spot the utensil you need. For instance, you can use blue labels for baking utensils and red for cooking tools.
Implement drawer dividers to separate items within a drawer, keeping them organized and preventing clutter from building up. Assign a specific drawer or container for each group, ensuring everything has a designated home.
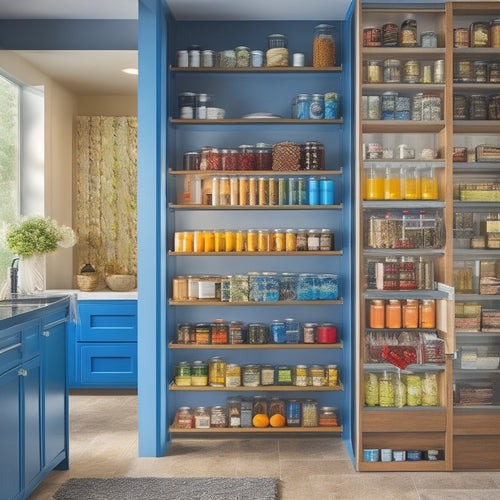
Utilize Vertical Storage Spaces
You can maximize your kitchen's storage capacity by using vertical spaces, such as walls, cabinets, and shelves, to store utensils that are less frequently used or take up too much counter space. By doing so, you'll free up valuable counter space and make your kitchen feel more organized and efficient.
Here are some ways to utilize vertical storage spaces:
-
Install wall hooks to hang items like pots, pans, utensils, and even aprons, keeping them easily accessible while keeping your countertops clear.
-
Use hanging baskets to store items like kitchen towels, oven mitts, and spices, keeping them organized and within reach.
-
Add magnetic strips to store metal utensils, knives, or spices, keeping them organized and easy to find.
- Invest in shelf organizers to maximize the storage capacity of your cabinets and shelves, keeping items like plates, bowls, and cups organized and easy to access.
Optimize Your Drawer Organization
By assigning a home to each utensil in your drawers, you'll create a sense of control and harmony in your kitchen, allowing you to focus on cooking rather than searching for misplaced items. To achieve this, start by categorizing your utensils into groups, such as baking, cooking, and serving tools.
Next, use drawer dividers to separate these categories and create distinct compartments within your drawers. This will prevent utensils from getting jumbled together and make them easier to find.
To take your organization to the next level, consider implementing a color-coding system. Assign a specific color to each category, and use labels or bins in that color to store the corresponding utensils. For example, you could use blue labels for baking utensils and red labels for cooking utensils.
This visual system will help you quickly identify where each utensil belongs, making it easier to maintain your organized space. By following these steps, you'll be able to find what you need in a flash, saving you time and reducing stress in the kitchen.
Create a Utensil Station Hub
Designate a specific area on your countertop as a utensil station hub, where frequently used items are easily accessible and neatly stored, freeing up space in your drawers and cabinets. This centralized spot allows you to quickly grab what you need, saving time and reducing clutter.
When designing your utensil station, consider the following essentials:
-
Utensil holder: A container or tray to store frequently used utensils, such as spoons, spatulas, and whisks.
-
Spice rack: A compact rack to hold your most-used spices, keeping them within easy reach.
-
Oils and condiments: A designated space for olive oil, salt, pepper, and other frequently used condiments.
- Recipe stand: A small stand or clip to hold your recipe book or tablet, keeping it clean and at eye level.
Store Heavy Items at the Bottom
Organize your utensil station hub by placing heavier items, like stand mixers or blenders, at the bottom to create a stable foundation and prevent toppling. This strategic weight distribution guarantees that your storage solutions remain balanced and secure.
By storing heavy items on the bottom shelf, you'll avoid the risk of them falling and causing a mess or even injury.
Additionally, storing heavier items at the bottom allows for easier access to lighter utensils and gadgets, making it more convenient for you to serve others. When you need to retrieve a lighter item, you won't have to navigate through a cluttered or top-heavy storage space.
Label and Sign Your Storage
You maximize the functionality of your utensil storage by assigning clear labels and signs to each compartment, ensuring you can quickly identify what's inside without having to dig through everything. This saves you time and reduces frustration when searching for a specific utensil.
Here are some effective ways to label and sign your storage:
-
Color code your labels: Use different colors to categorize utensils by type, such as baking, cooking, or serving. This visual reminder helps you quickly locate the utensil you need.
-
Use magnetic strips for small items: Label each strip with the contents, such as 'spices' or 'oils,' and attach them to the side of a cabinet or fridge.
-
Hang utensils with hanging hooks: Label each hook with the utensil's name, making it easy to find what you need at a glance.
- Create a utensil directory: Create a visual directory on the inside of a cabinet door or on a nearby wall, listing the contents of each compartment or shelf.
Maintain Your Organized System
Sustain Your Organized System
Regular check-ups of your utensil storage system prevent clutter from building up again, guaranteeing your kitchen remains efficient and stress-free. You've worked hard to create an organized space, and consistent upkeep is vital to sustaining it. Set aside time each week to declutter and sustain your organizing systems.
Here's a simple maintenance routine to follow:
| Task | Frequency | Tips |
|---|---|---|
| Wipe down utensil holders | Daily | Remove any food residue or spills |
| Check expiration dates | Weekly | Discard expired or spoiled food |
| Reorganize utensils | Bi-Weekly | Ensure frequently used items are easily accessible |
| Deep clean utensil storage | Monthly | Remove all items and wipe down shelves |
| Review and adjust system | Quarterly | Assess what's working and what needs improvement |
Frequently Asked Questions
How Often Should I Clean My Utensil Organizers to Prevent Dust Buildup?
You should clean your utensil organizers weekly to prevent dust buildup, which can lead to moisture accumulation and rust. Regular cleaning helps maintain a hygienic environment and prevents rust from forming on your utensils.
Can I Use Adhesive Hooks to Hang Utensils on a Tile Backsplash?
Did you know that 75% of homeowners prefer a clutter-free kitchen? You can achieve this by using adhesive hooks to hang utensils on your tile backsplash, freeing up space for creative utensil storage solutions like mason jars.
What Is the Best Way to Organize Utensils in a Small, Galley Kitchen?
In your small galley kitchen, you'll maximize space by using drawer dividers for utensil separation and wall hooks for hanging frequently used items, while also considering hanging baskets and magnetic strips for additional storage solutions.
Can I Repurpose Old Mason Jars for Utensil Storage on the Countertop?
You can repurpose old mason jars for utensil storage on the countertop, but consider alternatives like ceramic crocks or wooden utensil holders for a more rustic look, and optimize countertop organization by grouping similar items together.
How Do I Prevent Utensils From Getting Tangled or Knotted in Storage?
To prevent utensils from getting tangled or knotted in storage, you'll want to implement untangling solutions like drawer dividers or hanging racks, which keep items separate and organized, making knotted prevention a breeze.
Related Posts
-

Sliding Pantry Organizers With Tiered Racks
Sliding pantry organizers with tiered racks optimize your pantry space and enhance accessibility. These organizers cr...
-

Roll-Out Trays for Modular Kitchen Cabinets
Roll-out trays are the perfect addition to your modular kitchen cabinets, enhancing both accessibility and organizati...
-

Easy-To-Install Kitchen Wall-Mounted Racks
Installing easy-to-use kitchen wall-mounted racks is a smart way to maximize your space. These racks help keep your c...


