Kitchen Revamp: Open Shelves and Design Guide
Share
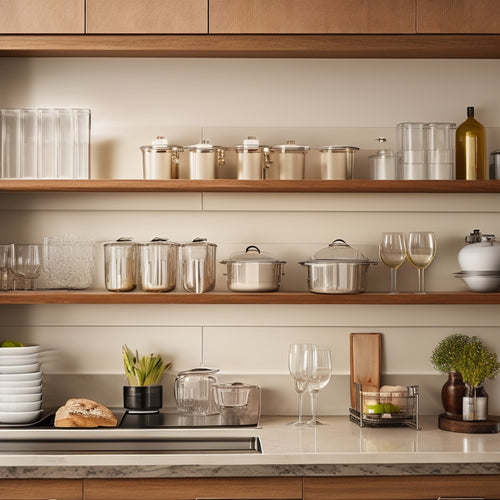
I opted for open shelves in my kitchen revamp, ditching traditional cabinets for a more airy feel. The switch created a seamless flow and visual harmony, making the space feel more expansive. I styled the shelves with vintage-inspired ceramics, cookbooks, and utensils, adding organizational tools like metal plate racks and woven baskets for practicality. To achieve a rustic charm, I chose reclaimed wood with natural flaws and warmth, varying the shelf depths for visual interest. With the shelves in place, I could focus on adding decorative touches - and that's where the real fun began.
Key Takeaways
• Switch to open shelves for a more airy and visually appealing kitchen, and style them with curated decor and organizational tools.
• Choose solid wood shelves with varying depths and natural flaws for a rustic, sturdy, and visually interesting design.
• Add aesthetic enhancements like vintage decor, landscape prints, and metal accents to create a unique and eclectic kitchen style.
• Update walls and lighting with a fresh white palette, faux brick backsplash, and pendant light fixtures to create a clean and inviting atmosphere.
• Establish a budget and conduct cost analysis for each design decision and DIY project to ensure a financially feasible kitchen revamp.
From Cabinets to Open Shelves
As I embarked on my kitchen makeover, the decision to swap out traditional cabinets for open shelves was a deliberate one, driven by a desire to inject a sense of airiness and visual appeal into the space. I wanted to create a sense of flow and visual harmony, and open shelves seemed like the perfect solution.
When it came to shelf styling, I opted for a mix of decorative and functional pieces, carefully curating a selection of vintage-inspired ceramics, cookbooks, and kitchen utensils. To guarantee practicality and functionality, I also invested in a few clever organizational tools, such as a metal plate rack repurposed for holding plates and a set of woven baskets for storing linens and napkins.
Shelf Construction and Design
My shelves' rustic charm originates from the reclaimed wood I selected, its natural flaws and variations in tone adding warmth and character to the space. I opted for solid wood shelves, guaranteeing they're sturdy and safe to hold my kitchen essentials. When it came to materials selection, I prioritized durability and aesthetics.
I chose a mix of 1x6 and 1x8 planks for varying depths and visual interest.
For additional support, I installed brackets between shelves, maintaining a consistent 12-inch spacing.
To secure stability, I fastened the shelves to the wall with screws.
I intentionally left the wood in its natural state, embracing its imperfections and character.
Aesthetic Enhancements and Decor
I infused my kitchen with vintage charm by incorporating eclectic decor pieces, including framed canvas paintings, antique furniture elements, and repurposed items that exude a sense of history and character.
To create an English kitchen feel, I added landscape and flower prints, which complement the vintage decor perfectly. A metal plate rack now holds my favorite dinner plates, while French mustard and marmalade crocks store utensils, adding a touch of whimsy.
I also sprinkled in boxwood sprigs and other vintage decor pieces throughout the space to create a visually appealing atmosphere. The result is a kitchen that feels warm, inviting, and full of character, with each decorative element carefully chosen to tell a story.
Wall and Lighting Updates
Fresh from the aesthetic enhancements, I turned my attention to revamping the kitchen's walls and lighting, starting with a bold experiment: a faux brick backsplash that added a touch of rustic charm to the space.
I wanted to create a warm and inviting atmosphere, so I opted for a white palette on the walls and ceiling to provide a clean canvas for my design elements.
Some key updates included:
- Painting the walls and ceiling a crisp white for a fresh look
- Adding pendant light fixtures for task lighting and ambiance
- Installing a ruffle valance to add texture and visual interest
- Adding board and batten to the island for added depth and dimension
Financial Considerations Ahead
With every design decision and DIY project, the budget became an important consideration, as I weighed the costs of materials and labor against the value of investing in my dream kitchen. As I planned my open shelving, I conducted a cost analysis to ensure my vision was within reach. Here's a breakdown of my estimated costs:
| Category | Estimated Cost | Actual Cost |
|---|---|---|
| Shelf Materials | $500 | $450 |
| Labor (DIY) | $0 | $0 |
| Decorative Items | $200 | $250 |
| Lighting Updates | $300 | $350 |
Frequently Asked Questions
How Do I Organize Open Shelves to Minimize Visual Clutter?
"I'm hooked on the fact that 60% of homeowners prioritize decluttering when designing their kitchen! To minimize visual clutter on open shelves, I group similar items, maximize space with tiered displays, and use decorative containers to conceal kitchen essentials."
Can I Mix and Match Different Shelf Materials for a Unique Look?
I love experimenting with unique looks, so I'm all about mixing and matching different shelf materials to create a one-of-a-kind style that blends contrasting textures and custom designs, ensuring a visually appealing space that's both safe and stunning.
Are There Any Safety Concerns With Having Open Shelving Near a Stove?
"According to the National Fire Protection Association, 40% of home fires start in the kitchen. When installing open shelving near my stove, I prioritize safety precautions to avoid fire hazards, ensuring a safe distance between shelves and heat sources."
How Often Should I Clean and Dust Open Shelves to Maintain Their Appearance?
I clean my open shelves every 2-3 days, dusting with a microfiber cloth to prevent streaks, and schedule a deeper clean monthly to maintain their appearance and guarantee a safe, dust-free zone around my stove.
Can Open Shelving Be Adapted to Fit a Small or Narrow Kitchen Space?
"When it rains, it pours," and I've learned that even in small kitchens, open shelving can be a game-changer with space-saving solutions and storage solutions that prioritize minimalistic design and functional layouts, ensuring a clutter-free haven.
Related Posts
-

Stackable Kitchen Containers for Modular Systems
Stackable kitchen containers for modular systems change your cooking space by maximizing vertical storage and enhanci...
-

Sink Storage Solutions for Open-Concept Kitchens
To maximize storage in your open-concept kitchen, focus on clever under-sink solutions and vertical space utilization...
-

Pull-Out Cabinet Shelves for Dish Drainer Storage
Pull-out cabinet shelves are a revolutionary innovation for your dish drainer storage. They maximize vertical space a...


