
Easy Kitchen Shelving Installation: A Step-by-Step Guide
You'll need a solid game plan to ace your kitchen shelving installation project. Start by clearing the room, sorting items into labeled boxes, and prepping walls for a dust-free environment. Next, select a shelving system that fits your style, space, and needs. Identify wall studs, measure accurately, and draw a reference line for shelf placement. Follow the manufacturer's instructions for assembly, and securely attach shelving units to wall brackets. As you move forward, you'll refine your installation, adding shelves, accessories, and decorative accents. Now, get ready to fine-tune the details that'll make your kitchen shelving installation a true success.
Key Takeaways
• Clear the kitchen of clutter, furniture, and appliances to ensure a clean and dust-free environment for installation.
• Choose a shelving material that fits your desired style and is durable, such as wood, metal, or glass.
• Identify wall studs using a stud finder and measure wall sections accurately to ensure secure shelf installation.
• Follow the manufacturer's instructions for assembly and installation, and double-check shelf stability and secure fastening.
• Assess the kitchen layout for functionality and flow, making adjustments as needed for seamless organization and visual balance.
Choosing the Right Shelving System
When choosing a shelving system for your kitchen, consider the room's dimensions, your storage needs, and the style you're aiming to achieve, as these elements will help you narrow down the wide range of options and select the perfect fit.
You'll want to think about the type of shelving materials that complement your kitchen's aesthetic, such as wood, metal, or glass. Additionally, consider the durability and maintenance requirements of each material.
To optimize your kitchen's space, think about the layout and configuration of your shelving system. Will you need wall-mounted shelves, floor-to-ceiling units, or a combination of both? Consider the height and depth of your shelves, as well as the spacing between them, to make sure you're maximizing your kitchen's vertical and horizontal space.
Preparing the Kitchen for Installation
Before bringing in the shelving system, clear the kitchen of clutter, furniture, and appliances to create a clean slate, guaranteeing a smooth and efficient installation process. This step is pivotal in preventing any obstacles or hindrances during the installation.
Begin by decluttering the space, sorting items into categories, and storing them in labeled boxes or bins. Organizing your tools and materials will also save you time and energy in the long run.
Next, focus on preparing the walls and surfaces. If you plan to paint the walls, now is the time to do so. Make sure the paint is fully dry before proceeding with the installation. Clean all surfaces, including the walls, countertops, and floors, to ensure a clean and dust-free environment.
Remove any outlet covers, light switch plates, and doorknobs to prevent damage during the installation process. By doing so, you'll be able to focus on the installation without any distractions or interruptions, resulting in a successful and stress-free experience.
Measuring and Marking the Walls
With the kitchen cleared and prepared, you're ready to take exact measurements of the walls to guarantee a perfect fit for your shelving system, starting with identifying the wall studs. Use a stud finder to locate the studs, usually 16 inches on-center, and mark their positions lightly with a pencil.
Next, measure the width and length of each wall section where you'll be installing the shelving, taking note of any obstacles like electrical outlets or windows. Record these measurements accurately to make sure a seamless shelving layout.
To ensure measuring precision, use a level and a straightedge to draw a reference line along the wall, parallel to the floor. This line will serve as a guide for marking the shelf placement. Using a combination square, transfer the measurements from your notes onto the wall, marking the shelf positions with a pencil. Double-check your marks for accuracy before proceeding.
A precise marking technique is essential at this stage, as it will impact the overall installation. With your walls measured and marked, you're now ready to move on to the next step in your kitchen shelving installation project.
Assembling the Shelving Units
You'll start assembling the shelving units by unpacking and organizing all the components, carefully verifying that you have all the necessary parts and hardware according to the manufacturer's instructions. This step is essential to guarantee a smooth and successful installation process.
Next, follow the manufacturer's instructions to assemble the shelving frames, shelves, and any additional features such as drawers or cabinets. Pay attention to the shelving alignment, ensuring the shelves are level and evenly spaced.
Here's a breakdown of the typical assembly process:
| Component | Assembly Steps |
|---|---|
| Shelving frames | Attach legs, connect side panels, and secure top and bottom panels |
| Shelves | Attach shelf brackets, add shelf boards, and secure with screws |
| Drawers/Cabinets | Assemble drawer/cabinet frames, attach slides/rollers, and secure with screws |
| Back panels | Attach back panels to shelving frames, ensuring a flush fit |
| Hardware | Install any additional hardware, such as handles or knobs |
Remember to refer to the manufacturer's instructions for specific assembly requirements, as these may vary depending on the type and brand of shelving units you're using. By following these steps, you'll guarantee a sturdy and well-organized shelving system that meets your kitchen's unique needs.
Installing the Wall Brackets
Now that your shelving units are fully assembled, it's time to attach them to the wall using the wall brackets, which will provide added stability and prevent the units from tipping over.
Begin by identifying the wall studs behind your kitchen wall using a stud finder. This is essential, as the brackets must be anchored to the studs to guarantee maximum weight capacity.
Hold the bracket against the wall, making sure it's level and aligned with the shelf's screw holes. Mark the screw holes on the wall with a pencil. Drill pilot holes into the marked spots, then screw the bracket into place.
Repeat this process for each bracket, ensuring they're spaced evenly apart. Double-check the bracket alignment to confirm it's perfectly horizontal and vertical.
Once all brackets are securely fastened, you can be confident that your shelving units will hold the desired weight capacity without compromising stability.
Hanging the Shelving Units
Hanging the Shelving Units
Having secured the wall brackets, attach the shelving units to them by aligning the shelf's screw holes with the bracket's screw holes, then screw the shelf into place. Make certain the shelf is level and the weight distribution is even. You can use a level tool to guarantee the shelf is perfectly horizontal.
When hanging the shelving units, it's vital to find the studs behind the wall to make sure the brackets are securely attached. You can use a stud finder to locate the studs, typically 16 inches on center. This will provide a solid anchor for your shelving units, preventing them from collapsing under the weight of your kitchen items.
As you hang each shelving unit, double-check that it's securely attached to the wall bracket. Make any necessary adjustments to guarantee the shelf is level and plumb.
Adding Shelves and Accessories
With the shelving units firmly in place, attention turns to adding shelves and accessories that will maximize storage capacity and enhance the overall functionality of your kitchen. Begin by installing shelves, taking care to space them evenly to accommodate your kitchen's unique needs.
Next, focus on shelf organization by adding dividers, baskets, or bins to keep items tidy and easily accessible. This will help you make the most of your kitchen's storage space.
To add a touch of personality to your kitchen, incorporate decorative accents such as crown molding, corbels, or trim. These elements can elevate the overall aesthetic of your kitchen while also providing additional support for your shelves.
When choosing decorative accents, consider the style and theme of your kitchen to ensure a cohesive look. By carefully selecting and installing shelves and accessories, you'll be able to create a kitchen that's both functional and visually appealing.
Final Touches and Adjustments
Upon completing the installation of shelves and accessories, you'll want to step back and assess your kitchen's new layout, making any necessary adjustments to guarantee a seamless flow and maximum functionality.
To affirm your kitchen shelving installation is both functional and visually appealing, consider the following key elements:
-
Shelving stability: Double-check that all shelves are securely fastened to the wall or surrounding structure to prevent any potential collapse or tipping.
-
Shelf spacing: Adjust the spacing between shelves to accommodate the items you plan to store, ensuring easy access and retrieval without overcrowding.
-
Visual balance: Make sure the shelves are evenly spaced and symmetrical, creating a sense of harmony and visual appeal in your kitchen.
Common Installation Mistakes
As you finalize your kitchen shelving installation, beware of common pitfalls that can compromise the functionality and aesthetic of your new layout. One of the most critical mistakes is improper anchoring of the shelving system to the wall. Failing to use suitable anchoring hardware can lead to the shelves collapsing under the weight of your kitchen essentials. Make sure to choose hardware that's compatible with your wall type and follow the manufacturer's instructions.
Another common mistake is underestimating the weight capacity of your shelves. Don't assume that a shelf can hold a certain amount of weight based on its appearance. Always check the manufacturer's recommended weight capacity and plan your storage accordingly. Overloading your shelves can cause them to bend, sag, or even break, which can lead to costly repairs and even safety hazards.
Frequently Asked Questions
Can I Install Kitchen Shelving on Plaster or Uneven Walls?
When tackling a Herculean task like kitchen shelving installation, you'll want to guarantee a sturdy foundation. Yes, you can install shelving on plaster or uneven walls, but you'll need wall anchors for stability and the right tools to achieve best weight distribution.
How Do I Clean and Maintain My New Kitchen Shelving?
You'll want to establish a maintenance schedule, incorporating regular cleaning tips like dusting and wiping down shelves with a damp cloth to prevent grime buildup, and implement best practices like preventative measures to guarantee your new kitchen shelving remains in top condition.
Are Kitchen Shelving Units Suitable for Heavy Appliances?
When choosing kitchen shelving units for heavy appliances, you'll want to guarantee weight distribution is even and the shelves are durable enough to support the load, addressing durability concerns to prevent collapse or damage.
Can I Customize My Kitchen Shelving With Non-Standard Sizes?
You can create custom shelving design to fit your kitchen's unique needs, incorporating non-standard sizes to accommodate specific appliances or items, resulting in unique storage solutions that maximize your space's functionality.
Do I Need a Permit to Install Kitchen Shelving in My Area?
Don't worry, you won't be stuck in bureaucratic red tape! Check with your local government to determine if you need a permit to install kitchen shelving; some areas require permits for structural changes, but many don't.
Related Posts
-
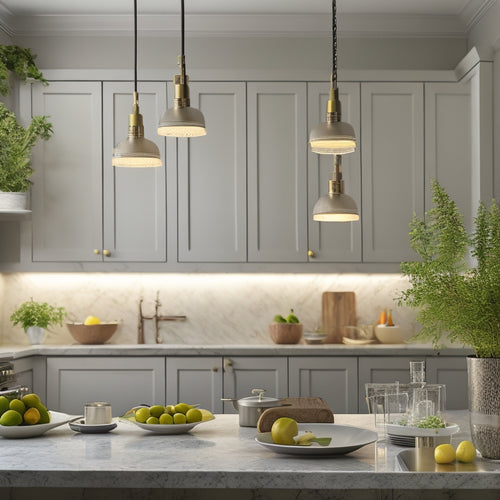
Tips for Choosing Under-Cabinet Lighting Fixtures
When choosing under-cabinet lighting fixtures, consider your kitchen's layout and functionality. Assess countertop ma...
-
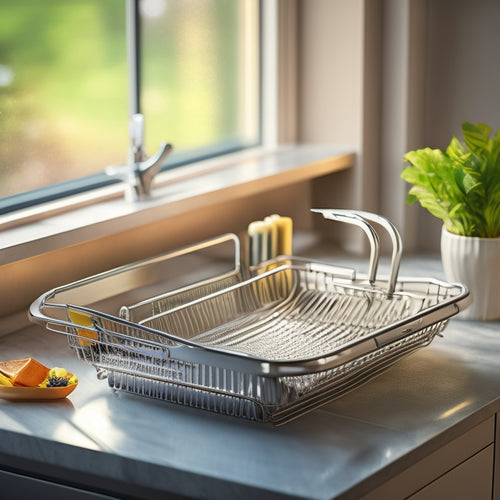
Rust-Resistant Dish Drainers for Long-Lasting Use
If you're looking for rust-resistant dish drainers, focus on materials like high-grade stainless steel for superior c...
-
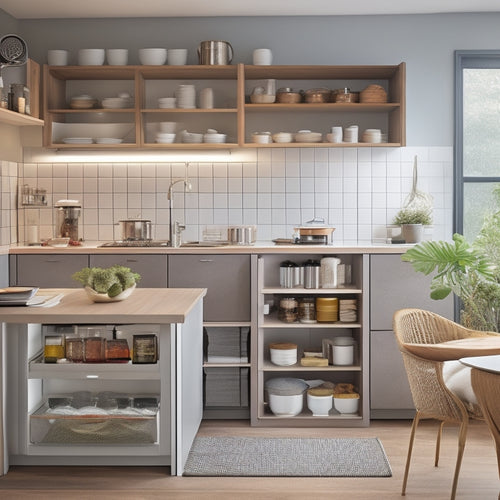
Space-Saving Kitchen Solutions for Busy Homeowners
To maximize your kitchen's potential, start with vertical storage solutions like wall-mounted shelves and pegboards f...


