Build Space-Saving Shelves for Small Kitchen Appliances
Share
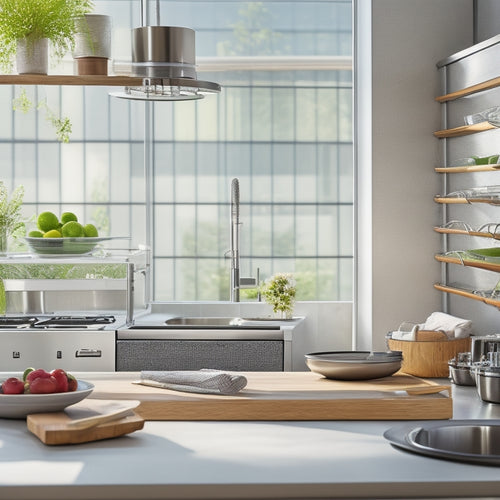
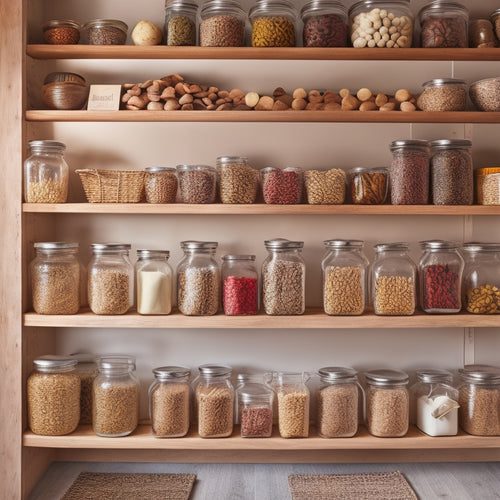
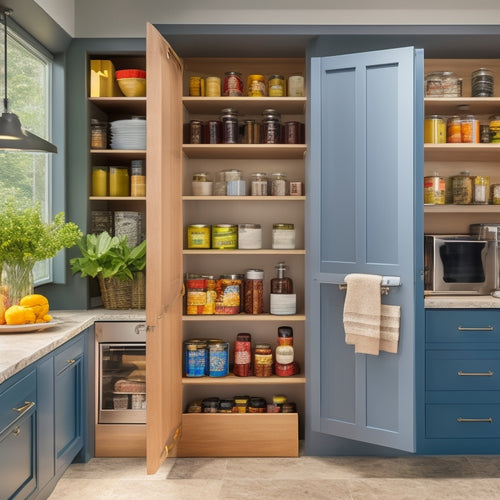
You're about to discover the secret to a clutter-free kitchen by creating space-saving shelves that fit your small kitchen appliances like a glove. Start by evaluating your kitchen space, pinpointing ideal shelf locations and identifying dead zones for maximum storage. Choose materials that complement your kitchen's aesthetic and functional needs, then measure and design your shelf layout for a perfect fit. With a sturdy frame, clever shelf placement, and functional storage options, you'll be on your way to a kitchen that's both stylish and efficient. Now, take the next step towards a kitchen that truly works for you.
Key Takeaways
• Measure kitchen dimensions and identify potential shelf locations to optimize storage capacity and workflow.
• Choose materials that complement your kitchen's aesthetic and functional needs, considering sustainable and eco-friendly options.
• Design shelves with adjustable depths and angular adjustments to accommodate unique kitchen layouts and appliance sizes.
• Ensure shelves are sturdy, durable, and can support small kitchen appliances, with consideration for ventilation and clearance needs.
• Implement a 'double-duty' shelving system and utilize corners and vertical space to maximize storage efficiency and reduce countertop clutter.
Assessing Your Kitchen Space
Measure your kitchen's dimensions and identify the areas where you can squeeze in a shelf or two, considering the locations of plumbing, electrical outlets, and any other obstacles that might impact your shelving plans. As you assess your kitchen space, think about your kitchen workflow - how you move around the room, where you prep food, and where you store utensils and appliances. This will help you determine the most functional spots for your shelves.
Consider your personal style, too. Do you prefer a minimalist look or a more rustic, country feel? This will influence the type of shelves you choose and how you design them.
Take note of any dead spaces, such as the area above your cabinets or the space between your wall and countertop. These can be perfect spots for installing shelves that'll maximize your storage capacity.
Choosing the Right Materials
With your kitchen space assessed and your personal style in mind, you're now ready to select the perfect materials for your space-saving shelves that'll complement your kitchen's aesthetic and meet your functional needs.
When choosing materials, consider sustainable options that not only help the environment but also add a touch of elegance to your kitchen.
Here are a few budget-friendly options to get you started:
-
Reclaimed wood: Add a touch of rustic charm to your kitchen with reclaimed wood shelves. Not only is it eco-friendly, but it also adds a unique character to your space.
-
Bamboo: Bamboo is a highly renewable resource that's both durable and stylish. It's perfect for creating a modern and sleek look in your kitchen.
-
Engineered wood: Engineered wood is a cost-effective alternative to solid wood and can be just as stylish. It's also a sustainable option that reduces waste and preserves natural resources.
Measuring for Optimal Fit
Precision is key when it comes to crafting space-saving shelves that seamlessly integrate with your kitchen's unique dimensions. So, take out your tape measure and get ready to pinpoint the perfect fit.
You'll want to measure the width, depth, and height of the area where you plan to install your shelves, taking note of any obstacles, such as plumbing or electrical outlets. Don't forget to check the corner clearance, making certain that your shelves will fit snugly without sacrificing valuable space. Angular adjustments may be necessary to accommodate unique kitchen layouts, so be prepared to make adjustments as needed.
As you measure, consider the size and shape of the appliances you'll be storing. Will they fit comfortably on the shelves, or will you need to make adjustments to accommodate larger or irregularly shaped items? Take your time, and don't be afraid to take multiple measurements to guarantee accuracy.
Designing Your Shelf Layout
Now that you've measured your space, it's time to think about designing your shelf layout.
You'll want to contemplate the size of your shelves, ensuring they're large enough to hold your appliances without overwhelming the space.
Shelf Size Considerations
You'll need to measure your appliances carefully to determine the ideal shelf size, as a mismatch can lead to wasted space or awkward arrangements. Consider the dimensions of each appliance, including their height, width, and depth, to make sure they fit comfortably on the shelf. Don't forget to account for any corner constraints, such as walls or adjacent cabinets, that may impact shelf size.
When designing your shelf layout, keep the following factors in mind:
-
Appliance depth: Adjustable depths can be helpful if you have appliances of varying sizes. This feature allows you to customize the shelf to accommodate each item perfectly.
-
Clearance: Make sure to leave enough clearance between appliances and the shelf's edges to avoid overcrowding and ensure easy access.
-
Shelf thickness: Choose a shelf thickness that provides sufficient support for your appliances while minimizing visual bulk.
Optimal Shelf Placement
As you design your shelf layout, consider the 'work zones' in your kitchen, placing your most frequently used appliances in easy-to-reach locations to maximize efficiency. This will help you navigate your kitchen with ease, saving you time and energy.
When deciding on shelf placement, think about the 'golden triangle' concept, where your most used appliances form the points of a triangle, making it easy to move between them.
Corner placement is also vital, as it can be a challenging space to utilize. Consider installing a carousel or a lazy Susan to make the most of this area.
Additionally, vertical stacking is a great way to optimize your shelf space. By stacking smaller appliances like toasters or blenders, you'll free up counter space and create a more streamlined look. Just be sure to leave enough clearance between shelves for easy access and to prevent overcrowding.
Building the Shelf Frame
As you begin building your shelf frame, you'll need to take into account the overall design and how it will support your small kitchen appliances.
You'll want to guarantee your frame is sturdy and can hold the weight of your items, so it's crucial to choose the right materials and assemble them correctly.
Shelf Design Considerations
Designing the shelf frame requires careful deliberation of your kitchen's unique dimensions and the appliances you plan to store, so measure accurately to guarantee a seamless fit. You'll want to contemplate the layout of your kitchen, taking into account any obstacles or constraints, such as plumbing or electrical outlets.
When designing your shelf frame, remember to ponder the following key factors:
-
Corner Carveouts: Reflect on how you can maximize storage in tight corners by incorporating curved or angled shelves.
-
Curved Corners: Soften the look of your shelves by incorporating curved corners, which can also help to prevent injuries from sharp edges.
-
Appliance Clearance: Make sure you leave enough clearance for your appliances to fit comfortably, taking into account any ventilation or cord requirements.
Frame Assembly Process
With your shelf design considerations in mind, you're ready to bring your vision to life by assembling the frame that will support your space-saving shelves. Start by gathering your materials and tools, making sure you have all the necessary pieces and equipment within reach.
Begin by building the side frames, using corner brackets to secure the vertical and horizontal elements. These brackets will provide added stability and guarantee your shelves remain level.
Next, attach the top and bottom frames, making sure they're perfectly aligned and securely fastened. Adjustable joints will come in handy here, allowing you to fine-tune the frame's dimensions and ensure a snug fit.
As you assemble the frame, double-check your measurements and make any necessary adjustments. With the frame taking shape, you'll start to visualize your space-saving shelves coming together.
Remember to take your time and work methodically, making sure each component is properly aligned and secured. By following these steps, you'll create a sturdy and reliable frame that will support your small kitchen appliances with ease.
Material Selection Tips
Selecting the correct materials for your shelf frame is essential to guaranteeing durability and stability, so choose materials that can support the weight of your small kitchen appliances and withstand the humid kitchen environment. You'll want to contemplate materials that are eco-friendly, durable, and resistant to moisture.
When selecting materials, keep the following tips in mind:
-
Opt for sustainable wood: Look for wood that's certified by organizations such as the Forest Stewardship Council (FSC) to ensure it's harvested responsibly.
-
Choose corrosion-resistant metal: Select metal frames that are made from materials like stainless steel or aluminum to withstand the humid kitchen environment.
-
Consider budget-friendly options: If you're working with budget constraints, contemplate using reclaimed or repurposed materials to build your shelf frame.
Adding Back Panels and Shelves
You'll beef up your space-saving shelves by attaching back panels and shelves, which not only conceal unsightly cords and mechanical components but also provide additional storage for infrequently used appliances.
When choosing a panel style, consider a flat panel or a decorative raised panel to match your kitchen's aesthetic. You can also add a pegboard or a magnetic board to create a functional storage space.
For shelf accessories, think about what you need to store. If you have a lot of small items like spices or oils, consider adding a spice rack or a small shelf divider. If you have larger appliances like a stand mixer or blender, look for shelves with sturdy brackets or reinforced edges to make certain they can hold the weight.
You can also add a utensil organizer or a drawer to store items like kitchen gadgets or cookbooks. By adding back panels and shelves, you'll create a functional and organized space that maximizes your kitchen's real estate.
Installing the Shelf Unit
Get ready to bring your space-saving shelves to life by assembling and mounting the shelf unit, a process that demands precision, patience, and a few trusty tools. You'll need to make sure the shelves are level and securely attached to the wall to prevent any accidents or damage.
Here's a checklist to get you started:
-
Leveling tools: Invest in a reliable level to guarantee your shelves are perfectly horizontal. This is essential for maintaining balance and preventing the shelves from tilting.
-
Corner brackets: Use sturdy corner brackets to reinforce the shelves and provide additional support. These will help distribute the weight of your appliances evenly.
-
Wall anchors: Choose the right wall anchors for your wall type to secure a strong hold.
Once you have these essentials, follow the manufacturer's instructions to assemble the shelf unit. Take your time, and double-check your work to avoid any mistakes.
With patience and attention to detail, you'll have your space-saving shelves up and running in no time, ready to hold your small kitchen appliances.
Organizing Small Kitchen Appliances
By strategically arranging your small kitchen appliances on the newly installed shelves, you can create a functional and clutter-free space that maximizes storage and accessibility.
To achieve this, consider dividing your appliances into Appliance Zones. This means grouping similar items together, such as coffee makers and toasters, to create zones that make sense for your workflow. This organization technique helps reduce Countertop Clutter, making it easier to navigate your kitchen.
When organizing your appliances, think about the frequency of use and the size of each item. Place the most frequently used appliances at eye level, while less frequently used items can be stored on higher or lower shelves.
Consider the size of each appliance and group similar sizes together to create a visually pleasing and functional layout.
Tips for Maximizing Storage
To maximize storage in your small kitchen, consider implementing a 'double-duty' shelving system, where each shelf serves multiple purposes, such as storing appliances and providing additional counter space. This approach will help you make the most of your kitchen's limited real estate.
Here are some additional tips to help you maximize storage:
-
Corner Utilization: Don't let those pesky corners go to waste! Install shelves or carousels that can rotate to make the most of this often-wasted space.
-
Vertical Expansion: Take advantage of your kitchen's vertical space by installing shelves that go all the way up to the ceiling. This will help keep your countertops clear and provide ample storage for infrequently used items.
-
Multifunctional Baskets: Use baskets or bins that can serve multiple purposes, such as storing utensils and providing a built-in cutting board.
Frequently Asked Questions
Can I Use Pre-Made Shelves or Do I Need to Build From Scratch?
"Oh, you're wondering if you can take the easy way out with pre-made shelves? Well, let's be real, you're sacrificing Shelf Customization and Design Flexibility for convenience - but hey, it's your kitchen, not a work of art."
How Do I Secure the Shelf to the Wall to Prevent It From Tipping?
You'll want to secure your shelf to the wall using wall anchors, ensuring a sturdy hold. Before adding weight, perform safety checks, verifying the shelf's stability and anchor strength to prevent tipping and potential accidents.
Are There Any Specific Tools Required for This DIY Project?
"A million DIY projects later, you're still unsure about the tools? Don't worry! For this one, you'll need a trusty power drill and some common sense to take basic safety precautions, like wearing goggles and keeping loose cords at bay."
Can I Add Doors or Drawers to My Space-Saving Shelf Unit?
You can definitely add doors or drawers to your shelf unit for extra storage and style! Consider installing soft-close doors with hidden handles for a sleek look that's both functional and visually appealing.
How Do I Clean and Maintain the Shelves to Prevent Dust Buildup?
You'll want to maintain your shelves by dusting regularly, ideally every 1-2 weeks, using microfiber cloths to trap dust particles and prevent buildup. This frequency guarantees your shelves stay clean, organized, and dust-free.
Related Posts
-

Top-Rated Dish Drainers for Kitchen Use
Top-rated dish drainers enhance your kitchen's efficiency and aesthetics. You'll find compact designs that save preci...
-

Innovative Pantry Storage Ideas for Homes
Revamp your pantry into an efficient space with innovative storage solutions. Use vertical storage options like ceili...
-

Affordable Sliding Pantry Drawer Solutions
If you're looking for affordable sliding pantry drawer solutions, you're in the right place. These drawers maximize s...


