7 Essential Tips for Organizing Kitchen Utensils
Share
You're ready to tackle the clutter and transform your kitchen into a efficient space! Start by purging and categorizing your utensils, assigning a home for each item, and utilizing vertical storage options. Optimize your drawer and cabinet storage with shelves, dividers, and containers. Implement a 'zone' cooking system to streamline your cooking process. Clearly label and sign everything, and establish a cleaning schedule to maintain your organized kitchen. By following these essential tips, you'll be well on your way to creating a kitchen that's not only functional but also a joy to cook in. Want to achieve kitchen utopia?
Key Takeaways
• Purge and categorize utensils to identify essential items and remove unused or broken ones, freeing up valuable storage space.
• Assign a designated home for each utensil, grouping similar items together for easy access and reducing clutter.
• Utilize vertical storage options like wall shelves and ceiling racks, and create designated storage areas for different utensils to maximize storage space.
• Implement a 'zone' cooking system, dividing the kitchen into prep, cooking, baking, and serving zones, and equipping each with necessary utensils.
• Label and sign each storage area clearly and consistently, using font and color coding to ensure easy identification and maintaining organization.
Purge and Categorize Kitchen Utensils
Purge and Categorize Kitchen Utensils
Start by gathering all your kitchen utensils from every nook and cranny, and then sort them into categories like baking, cooking, serving, and storage to get a sense of what you have and what you can get rid of. This step is important in achieving your kitchen goals, as it helps you identify what's essential and what's just taking up space.
As you sort, consider the utensil history - when was the last time you used it, and is it still in good condition? Be honest with yourself; if you haven't used it in the past year, it's probably safe to let it go. Set aside items that are broken, rusty, or no longer serve a purpose.
You'll be surprised at how freeing it feels to let go of clutter and focus on what truly matters. By purging and categorizing your utensils, you'll create a more efficient and organized kitchen that makes serving others a breeze.
Assign a Home for Each Item
Now that you've purged and categorized your kitchen utensils, it's time to assign a home for each item.
You'll want to designate specific spaces for your utensils, grouping similar items together, and placing them in easy-to-access locations.
Designate a Specific Space
Assign a specific spot for each kitchen utensil, ensuring that every item has a designated home within easy reach. This will help you maintain a clutter-free kitchen and reduce stress while cooking.
Start by identifying the most frequently used utensils and allocate a convenient spot for them. Consider the Countertop Flow, ensuring that the utensils you use most are within arm's reach.
For less frequently used items, designate a spot on a shelf or in a cabinet. Use Shelf Dividers to separate and categorize the items, making it easy to find what you need.
As you designate a specific space for each utensil, think about the workflow in your kitchen. Place utensils near the area where they'll be used most. For example, store a stand mixer near the baking station or a set of knives near the chopping board.
Utensil Grouping Categories
As you create a home for each utensil, categorize them into groups that make sense for your cooking habits, such as baking, cooking, or serving utensils. This will help you quickly find what you need when you need it.
Consider the following categories to get you started:
-
Utensil Pairs: Store utensils that are commonly used together, like a chef's knife and cutting board, or a whisk and mixing bowl, in the same area.
-
Cooking Styles: Group utensils by the type of cooking you'll be doing, such as grilling, roasting, or sautéing.
-
Frequency of Use: Store frequently used utensils in easy-to-reach locations, and less frequently used items towards the back or in harder-to-reach areas.
- Task-Specific Utensils: Designate a specific area for utensils used for specific tasks, like a pastry brush and pastry mat for baking.
Easy Access Locations
Place each utensil in a designated spot that makes sense for your workflow, ensuring that the items you use most often are within easy reach. This will save you time and energy in the long run.
For instance, store your frequently used utensils near the countertop corners, where they're easily accessible while you're cooking. This way, you won't have to dig through drawers or cabinets to find what you need.
Assign a home for each item based on how often you use it. For example, if you use your chef's knife daily, store it in a convenient spot near your prep area.
Less frequently used items, like special occasion utensils, can be stored in harder-to-reach areas or in separate storage containers.
Utilize Vertical Storage Space
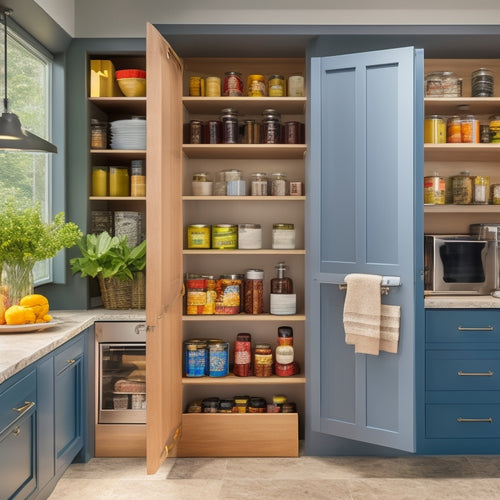
You can maximize your kitchen's storage potential by installing shelves, hooks, or a pegboard on walls or the back of a door to hold frequently used utensils. This will free up counter space and keep your kitchen organized.
Consider the following vertical storage ideas:
-
Wall Shelves: Install floating shelves or traditional shelves to store items like plates, bowls, and cookbooks. This is a great way to keep items visible and easily accessible.
-
Ceiling Racks: Use ceiling-mounted racks to store infrequently used items like special occasion dishes or seasonal decorations. This will keep them out of the way but still easily accessible.
-
Pegboards: Create a pegboard on a wall or door and hang utensils like pots, pans, and kitchen gadgets. This is a great way to keep frequently used items organized and within reach.
- Over-the-Door Storage: Use over-the-door storage racks or hooks to hang items like aprons, oven mitts, or cleaning supplies. This is a great way to utilize the space behind a door.
Optimize Drawer and Cabinet Storage
When it comes to organizing your kitchen utensils, you'll want to make the most of your drawers and cabinets. You can do this by maximizing the vertical space within them, using stackable containers or adjustable dividers to get the most out of every inch.
Maximize Vertical Space
Make the most of your kitchen's vertical real estate by installing shelves, baskets, or dividers that allow you to stack utensils and supplies from floor to ceiling. This will help you create more storage space and keep your countertops clutter-free.
Here are some ways to maximize your kitchen's vertical space:
-
Install stackable shelves to store infrequently used items, such as special occasion dishes or cookbooks.
-
Use wall hooks to hang items like pots, pans, or utensils, keeping them within easy reach.
-
Invest in adjustable shelves that can be customized to fit your kitchen's unique needs.
- Consider over-the-door storage for items like spices, oils, or cleaning supplies.
Utilize Corner Areas
Corner areas in the kitchen can be optimized with clever storage solutions to access items effortlessly. By installing corner shelves, you create a spot for infrequently used items like special occasion dishes or cookbooks, freeing up main cabinet space. These shelves can eliminate blind spots, making finding items easier.
Consider using a carousel or lazy Susan to maximize corner potential. Rotating shelves help access items at the back, reducing clutter and simplifying meal prep. Corner baskets or bins can store snacks, spices, or kitchen essentials. Utilizing corners reduces clutter, increases efficiency, and maximizes storage capacity. With creativity, turn wasted spaces into assets for easier cooking and serving enjoyment.
Implement a "Zone" Cooking System
Divide your kitchen into distinct zones, each dedicated to a specific cooking task, in order to optimize your utensil organization and workflow. This 'zone' cooking system streamlines your cooking process, allowing you to focus on the task at hand.
By categorizing your kitchen into specific areas, you'll reduce clutter, increase efficiency, and improve your overall cooking experience.
Here are four key zones worth exploring:
-
Prep Zone: Designate an area for food preparation, equipped with utensils like knives, cutting boards, and colanders.
-
Cooking Zone: Allocate a zone for cooking, featuring utensils like pots, pans, and cooking spoons.
-
Baking Zone: Create a zone for baking, stocked with utensils like mixers, measuring cups, and baking sheets.
- Serving Zone: Establish a zone for serving, complete with utensils like serving spoons, plates, and napkin holders.
Label and Sign Everything Clearly
By labeling and signing each zone and its corresponding utensils, you'll guarantee that everything has a designated place, making it easy to find what you need when you need it. This simple step will save you time and reduce frustration in the kitchen.
Use a consistent label font throughout the kitchen to create a cohesive look and make it easier to read. Consider using color coding to categorize utensils by type or zone, such as red labels for baking utensils and blue labels for cooking utensils. This visual system will help you and others quickly identify where items belong.
Be sure to label not only the utensils themselves but also the storage containers and zones. Use clear and concise language on your labels, avoiding abbreviations or jargon that might confuse others.
Maintain Your Organized Kitchen
Now that your kitchen utensils are labeled and signed, it's time to establish habits to maintain this organization, ensuring your kitchen remains clutter-free and functional over time. You've worked hard to get your kitchen organized, and with a few simple habits, you can keep it that way.
Here are some kitchen hacks to help you maintain your organized kitchen:
-
Create a cleaning schedule: Set aside time each week to tidy up your kitchen and clean your utensils. This will prevent clutter from building up and make cleaning easier.
-
Put things back in their place: Make it a habit to put utensils back in their designated spot after use. This will save you time in the long run and prevent clutter from accumulating.
-
Clean as you go: Clean your utensils and kitchen surfaces as you go to prevent crumbs and spills from building up.
- Schedule deep cleans: Set aside time each month to deep clean your kitchen, including the oven, fridge, and pantry.
Frequently Asked Questions
How Do I Handle Utensils With Multiple Functions or Uses?
"Imagine a clutter-free kitchen where every utensil has its place. To handle multi-functional utensils, you'll group them by function, like a pastry brush with baking tools, and store them in a designated multi-tool storage spot, keeping them organized and within reach."
What if I Have Limited Kitchen Counter or Shelf Space?
If you're short on kitchen counter or shelf space, you'll need to get creative! Opt for compact containers that maximize storage, and be space savvy by designating specific zones for frequently used utensils.
Can I Use Adhesive Hooks on My Kitchen Walls or Cabinets?
You're wondering if adhesive hooks on kitchen walls or cabinets are a viable solution. Yes, you can, but carefully consider hook placement to avoid wall damage. Choose sturdy hooks and follow the manufacturer's instructions for a secure hold.
How Often Should I Reorganize My Kitchen Utensil Storage System?
You should reorganize your kitchen utensil storage system every 3-6 months, or as needed, based on your personal preference and seasonal changes, making it a habit to purge items you no longer use or need.
Are There Any Specific Utensil Organizers for Corner Cabinets?
You'll find perfect solutions for corner cabinets in corner shelves with adjustable dividers, allowing you to customize storage for utensils like whisks, spatulas, and more, keeping them within easy reach while maximizing space.
Related Posts
-

Tips for Choosing Under-Cabinet Lighting Fixtures
When choosing under-cabinet lighting fixtures, consider your kitchen's layout and functionality. Assess countertop ma...
-

Dish Drainer Options for Kitchen Islands
When selecting dish drainers for your kitchen island, consider options that maximize space and enhance workflow. Comp...
-

Affordable Sliding Pantry Drawer Solutions
If you're looking for affordable sliding pantry drawer solutions, you're in the right place. These drawers maximize s...


