7 Essential Tips for Efficient Kitchen Storage Solutions
Share
You're tired of the clutter and chaos in your kitchen, and it's time to get organized! Start by evaluating your kitchen's storage needs, then purge and categorize your kitchen items to see what you really need. Maximize your cabinet space and utilize vertical storage options to free up floor and counter space. Designate zones for specific tasks to streamline your workflow. Implement a 'one in, one out' rule to maintain your new organization system. Finally, label and sign everything clearly to make sure everything has its place. By following these essential tips, you'll be well on your way to a more efficient kitchen - and there's even more to discover.
Key Takeaways
• Evaluate your kitchen's current storage situation and set realistic goals to optimize your space and workflow.
• Purge and categorize kitchen items, assigning a home for each kept item to maintain organization and accessibility.
• Maximize vertical space by installing shelves, hooks, or pegboards to free up floor and counter space.
• Designate task-specific zones in your kitchen to streamline workflow and enhance functionality.
• Utilize often-wasted areas, such as corners, by installing wall shelves or corner cabinets for extra storage.
Assess Your Kitchen Storage Needs
Before you start optimizing your kitchen storage, take stock of your current storage situation to identify what's working and what's not. This is essential in determining your kitchen inventory and setting realistic storage goals.
Walk around your kitchen, opening cabinets, drawers, and pantries to get a sense of what you have and how it's currently being stored. Make a mental note of the items you use frequently, those that are hard to access, and the ones that are simply taking up space.
Consider the layout of your kitchen and how it affects your workflow. Ask yourself, 'What are my storage goals? Do I want to free up counter space, create a more organized pantry, or improve overall accessibility?'
Purge and Categorize Kitchen Items
Next, tackle the clutter by sorting your kitchen items into three piles: keep, donate/sell, and discard. This step is important in adopting a declutter mindset, which is vital for achieving your kitchen goals.
Be honest with yourself – when was the last time you used that slow cooker or blender? If it's been over a year, it's probably safe to let it go. Be ruthless, and remember, the less you have, the less you'll have to store.
As you sort, ask yourself: 'Do I use this item regularly?' 'Is it in good condition?' 'Can I replace it if I need it again?' If the answer is no, consider donating or selling it. You'll not only declutter your kitchen but also make some extra cash or help someone in need.
Once you've purged your unwanted items, categorize the keepers into groups like baking, cooking, and dining. This will make it easier to assign a home for each item and make sure everything has a designated place.
Optimize Kitchen Cabinet Space
Now that you've purged and categorized your kitchen items, it's time to optimize your kitchen cabinet space.
You'll want to make the most of every inch by maximizing vertical space and utilizing those often-wasted corner areas.
Maximize Vertical Space
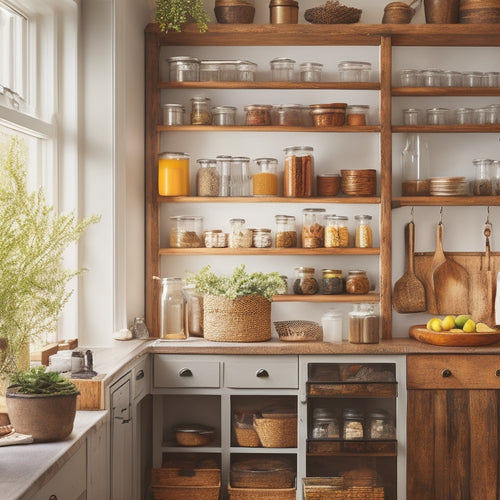
You can greatly increase your kitchen's storage capacity by utilizing the often-wasted vertical space within your cabinets. One effective way to do this is by installing wall shelves. These can be placed above your countertops, near the ceiling, or even on the back of a door.
By using wall shelves, you can store infrequently used items like special occasion dishes, cookbooks, or small appliances, keeping them out of the way but still easily accessible. Another clever way to maximize vertical space is by using ceiling hooks. These can be used to hang items like pots, pans, utensils, or even a kitchen island.
This won't only free up cabinet space but also add a touch of industrial chic to your kitchen. By making the most of your vertical space, you'll be able to store more items in a smaller area, making your kitchen feel more spacious and organized.
Utilize Corner Areas
Utilize Corner Areas
Corner areas in your kitchen cabinets often become dead zones, but with the right storage solutions, these spaces can be transformed into functional and accessible areas. You can install corner shelves or curved cabinets to maximize the space and make it easy to reach items.
Here are some benefits of utilizing corner areas:
| Storage Solution | Benefits |
|---|---|
| Corner Shelves | Easy to install, adjustable, and affordable |
| Curved Cabinets | Provides a smooth, continuous look, and easy to clean |
| Lazy Susan | Rotates for easy access, and space-saving |
| Carousel | Multiple tiers for maximum storage, and easy to install |
| Pull-Out Baskets | Easy to access, and customizable to fit your needs |
Utilize Vertical Storage Options
Utilize Vertical Storage Options
Maximize your kitchen's ceiling height by installing shelves, hooks, or a pegboard that take advantage of the often-wasted space above countertops and appliances. This won't only free up floor and counter space but also create a more organized and visually appealing kitchen.
Consider wall shelves with shelf dividers to store items like plates, bowls, and cups. These dividers will keep your items organized and prevent them from toppling over. You can also install hooks for hanging pots, pans, or utensils, keeping them within easy reach while cooking.
If you have high ceilings, consider installing a pegboard on a wall or the back of a door to hang items like baskets, bins, or even a spice rack. By utilizing vertical storage options, you'll be able to store more items in a smaller footprint, making your kitchen feel more spacious and efficient.
Designate Zones for Kitchen Tasks
By organizing your kitchen into designated zones for specific tasks, such as food preparation, cooking, and cleanup, you can streamline your workflow and make the most of your newly optimized storage space. This approach helps you create efficient work stations, where all the necessary tools and ingredients are within easy reach.
| Task Clusters | Zone Location | Essential Items |
|---|---|---|
| Food Prep | Counter near sink | Cutting board, knives, utensils |
| Cooking | Stovetop and adjacent counter | Pots, pans, cooking utensils |
| Cleanup | Sink and adjacent counter | Dish soap, sponges, trash can |
Implement a "One In, One Out" Rule
To maintain your newly organized kitchen and prevent clutter from building up again, adopt a 'one in, one out' rule, where you get rid of an old item every time you bring a new one into your kitchen. This rule will help you maintain a balanced amount of possessions and prevent your kitchen from becoming overcrowded. By implementing this rule, you'll be more mindful of your shopping habits and think twice before buying something new. Ask yourself if you really need it and if it aligns with your personal goals for a more organized kitchen.
When you bring a new item into your kitchen, take a moment to identify an old item that can be replaced or removed. This will help you maintain a balanced amount of possessions and prevent clutter from building up. By adopting this rule, you'll be more intentional with your purchases and create a more sustainable kitchen environment.
Label and Sign Everything Clearly
Label each storage container, shelf, and zone with its contents or purpose, making it easy for you to find what you need and maintain your kitchen's organization. This simple step will save you time and frustration in the long run.
When labeling, use a clear and concise language that's easy to understand. Consider implementing a labeling hierarchy, where you use broad categories on higher levels and get more specific as you drill down. For instance, you can label a shelf as 'Baking Supplies' and then label individual containers as 'Flour,' 'Sugar,' or 'Baking Powder.'
To take your labeling to the next level, incorporate color coding into your system. Assign a specific color to each category or zone, making it easy to identify where items belong. For example, you can use blue labels for baking supplies and red labels for cooking utensils. This visual cue will help you and others quickly find what they need.
Frequently Asked Questions
Can I Repurpose Old Furniture for Kitchen Storage?
You can breathe new life into old furniture by repurposing it for kitchen storage. Consider upcycling an old headboard into a kitchen island or transforming a vintage hutch into a storage cabinet, perfect for housing cookbooks and utensils.
How Often Should I Reorganize My Kitchen Storage Systems?
You should reorganize your kitchen storage systems every 2-3 months for a Seasonal Refresh, and whenever your needs change, to maintain a Personalized Layout that adapts to your evolving cooking habits and priorities.
Are Adjustable Storage Shelves Worth the Extra Cost?
"Will the flexibility of adjustable shelves be your kitchen's game-changer? You'll love the customization options, allowing you to maximize space optimization and create a tailored fit for your unique kitchen needs, making the extra cost worthwhile."
Can I Use Baskets to Store Items in Deep Cabinets?
You can definitely use baskets to store items in deep cabinets, opting for woven durability to guarantee they hold up over time. Add basket liners for easy cleaning and to prevent items from getting dusty or scratched.
Will a Kitchen Storage Overhaul Disrupt Daily Meal Prep?
Will a kitchen storage overhaul disrupt daily meal prep? Ah, the calm before the storm! You'll be relieved to know that a thoughtful workflow analysis will minimize disruptions, ensuring your meal frequency remains uninterrupted, and your kitchen remains a haven for serving others.
Related Posts
-

Under-Sink Storage Tips for Minimalist Kitchens
To maximize under-sink storage in your minimalist kitchen, start by utilizing vertical space with shelf risers and st...
-

Creative Organization Ideas for Tight Kitchen Spaces
To create an organized kitchen in tight spaces, think upwards. Install shelves that reach the ceiling and use wall-mo...
-

Dish Drainer Options for Kitchen Islands
When selecting dish drainers for your kitchen island, consider options that maximize space and enhance workflow. Comp...


