7 Essential DIY Kitchen Storage Hacks for Small Spaces
Share
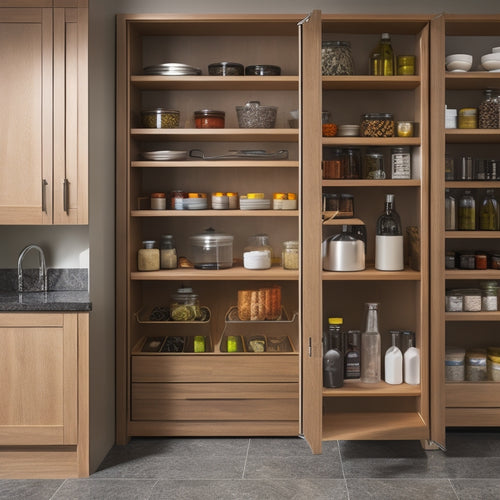
Revamp your small kitchen with these 7 essential DIY storage hacks! Maximize corner space with rotating shelves and floating shelves. Utilize the back of cabinet doors with over-the-door organizers and pocket storage. Create a pegboard station with hooks of various sizes and types. Convert an existing drawer into a spice rack drawer. Optimize your kitchen cart by rearranging shelves and adding a countertop extension. Repurpose old furniture into functional storage units. From upcycled kitchen islands to magnetic boards, you'll discover clever ways to transform your kitchen into a clutter-free haven, and there's more to explore!
Key Takeaways
• Maximize corner space with carousels, rotating shelves, and floating shelves to keep kitchen organized and clutter-free.
• Utilize the back of cabinet doors with over-the-door organizers, cabinet door pockets, and small item storage for convenient access.
• Create a pegboard station with hooks of various sizes to design a customized tool organization system and maximize vertical space.
• Optimize kitchen carts by rearranging shelves, adding countertop extensions, and designating areas for utensils, cookbooks, and spices.
• Repurpose old furniture pieces, such as headboards, sideboards, and dressers, into functional kitchen islands, wine racks, and storage units.
Maximize Corner Space With Shelves
What's often the most challenging spot to utilize in your kitchen - the corner space - can become a goldmine of storage with the strategic installation of shelves.
By incorporating Corner Carousels, you can effortlessly access items stored in the back of the corner, eliminating the need to dig through cluttered cabinets. These rotating shelves allow you to utilize the often-wasted space in the corner, keeping your kitchen organized and clutter-free.
Floating Shelves are another innovative solution to maximize corner space. These sleek, modern shelves appear to be floating on the wall, creating a visually appealing and uncluttered look. By installing Floating Shelves at different heights, you can create a customized storage system that accommodates items of various sizes.
Imagine having easy access to your favorite cookbooks, spices, or kitchen gadgets, all within arm's reach. With Corner Carousels and Floating Shelves, you can transform your kitchen's corner space into a functional and stylish area that makes cooking and entertaining a breeze.
Utilize Back of Cabinet Doors
Now that you've optimized your kitchen's corner space, turn your attention to the often-overlooked real estate on the back of your cabinet doors. This hidden area is perfect for storing small items that are frequently used, freeing up valuable counter and shelf space.
Over the door organizers are a great solution, providing a convenient spot to hang items like spices, oils, or cleaning supplies. For a more customized approach, consider installing cabinet door pockets. These clever storage solutions can be tailored to fit your specific needs, accommodating everything from utensils to recipe cards.
By utilizing the back of your cabinet doors, you'll be amazed at how much clutter you can eliminate from your kitchen. Plus, with everything easily accessible, you'll save time and streamline your cooking workflow.
Create a Pegboard Station
As you set up your pegboard station, you'll need to prep the surface with a sturdy board and a grid of holes.
Next, you'll customize the space by hanging your most-used tools and utensils in a way that makes sense for your cooking style.
Pegboard Prep Essentials
You'll need a few essential items to create a functional pegboard station that maximizes your kitchen's storage potential. Before you start drilling holes and hanging hooks, take some time for pegboard planning. Think about the items you want to store and the space you have available. Contemplate the layout of your kitchen and where the pegboard will be most accessible.
Here are the essentials you'll need to get started:
- A pegboard panel (available at most hardware stores or online)
- Hooks of various sizes and types (e.g., bins, baskets, tools, utensils)
- A drill and drill bits
- Wall anchors or screws
- A level and measuring tape
When selecting hooks, think about the items you want to store and choose hooks that fit those items snugly. You'll also want to contemplate the weight capacity of each hook to ascertain your pegboard can hold everything you need it to.
With these essentials in hand, you'll be ready to start building your pegboard station and maximizing your kitchen's storage potential.
Customized Tool Organization
With your pegboard panel and essential accessories in hand, start by mapping out a customized tool organization system that suits your cooking style and available space.
Envision the layout of your pegboard station, considering the tools you use most frequently and how you can group them for easy access. Think about the 'zones' you'll create – such as a baking station or a cooking prep area – and allocate space accordingly.
Use tool belts to hang frequently used items like utensils, oven mitts, or spice jars, keeping them within easy reach.
For smaller items, install drawer dividers to separate and store kitchen gadgets, spices, or oils. This will prevent clutter from building up and make it easier to find what you need when you need it.
As you design your pegboard station, remember to leave some breathing room between each zone. This will create a sense of visual calm and make the space feel more organized.
With a little creativity and planning, your customized tool organization system will become the heart of your kitchen, making meal prep a breeze and helping you serve others with ease.
Maximize Vertical Space
Take advantage of your kitchen's often-wasted vertical space by installing a pegboard station that stretches from floor to ceiling, providing ample storage for your cookware, utensils, and gadgets.
This smart storage solution will keep your kitchen organized, clutter-free, and functional. Plus, it's a great way to showcase your favorite kitchen tools and accessories.
Here are some ideas to maximize your pegboard station:
- Install hooks for hanging pots, pans, and utensils
- Add baskets and bins for storing spices, oils, and other small items
- Use adhesive-backed magnets to store metal items like knives and spices
- Incorporate window shelves for displaying cookbooks, decorative items, or plants
- Hang a pegboard on the back of a door or under a cabinet to utilize dead space
Install a Spice Rack Drawer
Maximize your kitchen's real estate by converting an existing drawer into a spice rack drawer, effortlessly keeping your seasonings organized and within easy reach. This DIY hack is a game-changer for small kitchens, where every inch counts.
To get started, measure the inside of your chosen drawer and purchase drawer dividers that fit snugly. You can find these at most home goods stores or online.
Next, sort your spices by category (e.g., baking, savory, etc.) and allocate a section of the drawer to each group. This will make it easy to find what you need when you need it. Consider adding small labels to the dividers to help you quickly identify each section.
Optimize Your Kitchen Cart
Transform your kitchen cart into a productivity powerhouse by strategically arranging its components to streamline meal prep and cooking tasks. A well-organized cart can be a game-changer in a small kitchen, providing additional counter space and storage for frequently used items.
Here are some tips to optimize your kitchen cart:
-
Cart reorganization: Rearrange the shelves and baskets to prioritize your most-used items, keeping them easily accessible.
-
Countertop extension: Consider adding a butcher-block top or a granite overlay to increase your cart's surface area, providing more room for food preparation.
-
Assign a home: Designate specific areas for utensils, cookbooks, and spices to maintain a sense of order and make cooking more efficient.
-
Utilize the sides: Take advantage of the cart's vertical space by attaching a pegboard or a utensil holder to store items like pots, pans, and kitchen gadgets.
-
Keep it tidy: Establish a routine to wipe down the cart and tidy up its contents regularly, ensuring your kitchen remains clutter-free and functional.
Design a Magnetic Board
Create a visually appealing and functional magnetic board by repurposing an old metal sheet, a vintage chalkboard, or a decorative metal frame, and outfitting it with strong magnets that can hold everything from spice jars to kitchen notes. This DIY project is a game-changer for small kitchens, as it provides a convenient spot to store frequently used items, freeing up valuable counter space.
To take your magnetic board to the next level, consider adding some personal touches. You can decoupage a pattern or design onto the surface, or add a few decorative magnets in shapes or colors that match your kitchen's aesthetic. This won't only make the board more visually appealing but also create a cohesive look in your kitchen.
Additionally, you can label the magnets with the contents they're holding, making it easy to find what you need at a glance. With a little creativity and some strong magnets, you'll be enjoying the benefits of a stylish and practical magnetic board in no time.
Repurpose an Old Furniture Piece
Give new life to an old dresser, bookshelf, or cabinet by repurposing it as a kitchen storage unit, perfect for stashing cookbooks, utensils, or infrequently used appliances. You can breathe new life into an outdated piece of furniture, making it a functional and stylish addition to your kitchen.
Here are some ideas to get you started:
-
Upcycle an old headboard into a kitchen island with built-in storage for utensils and cookbooks.
-
Transform a vintage sideboard into a wine rack and storage unit for infrequently used kitchen gadgets.
-
Repurpose an old bookshelf into a spice rack and storage unit for oils and condiments.
-
Convert an old dresser into a kitchen cart with drawers for storing plates, bowls, and cups.
-
Turn an old cabinet into a built-in coffee station with storage for coffee beans, filters, and creamer.
Frequently Asked Questions
Can I Use DIY Storage Hacks in a Rented Kitchen?
As a renter, you're likely wondering if DIY storage hacks are allowed in your kitchen. Rest assured, you have renter's rights to make portable solutions that don't damage the space, so go ahead and get creative with storage ideas that are easy to install and remove.
Are DIY Kitchen Storage Hacks Expensive to Implement?
"Cut to the chase, you're wondering if DIY kitchen storage hacks break the bank. Relax, most are budget-friendly and cost-effective, allowing you to maximize your space without blowing your budget constraints."
Can I Customize DIY Storage Hacks to Fit My Kitchen Style?
You can absolutely customize DIY storage hacks to fit your kitchen style, allowing for personalized solutions that reflect your unique taste. With design flexibility, you're free to experiment and create a space that truly serves you and your loved ones.
Do DIY Storage Hacks Require Professional Installation?
'As you explore DIY storage hacks, don't worry, you won't need a pro's touch - unless you're short on time or lacking confidence in your skill levels, in which case, consider calling in a reinforcement to save the day.'
Are DIY Kitchen Storage Hacks Durable and Long-Lasting?
When you choose the right materials, you'll find that your DIY storage hacks are durable and long-lasting. Opt for weather-resistant materials, and your creations will withstand the test of time, staying functional and looking great.
Related Posts
-

Space-Saving Lazy Susan Cabinet Solutions
Space-saving Lazy Susan cabinet solutions can change those awkward corner spaces into organized storage wonders. You'...
-

Roll-Out Trays for Organizing Baking Supplies
Roll-out trays are perfect for organizing your baking supplies, making your kitchen more efficient. They maximize spa...
-

Space-Efficient Dish Racks for Tiny Homes
Space-efficient dish racks are a game changer for tiny homes. By utilizing vertical storage, you can free up signific...


