10 Free DIY Kitchen Storage Plans to Organize
Share
You're just a few DIY projects away from a clutter-free kitchen! Repurpose old pallets into rustic kitchen shelves or upcycle mason jars for charming storage. Create drawer dividers for best cabinet organization or build a kitchen cart with shelves for additional storage. With easy shelf liner installation and customizable shelf organizer systems, you'll maximize your shelf space in no time. Whether you need under sink storage baskets or a kitchen utensil holder made from wood, these 10 free DIY kitchen storage plans will guide you through the process. Get ready to unleash your kitchen's full potential!
Key Takeaways
• Repurpose materials like pallets and mason jars to create functional and eco-friendly storage solutions for your kitchen.
• Design and install custom shelves, drawer dividers, and corner storage to optimize kitchen space and reduce clutter.
• Utilize vertical space with floating shelves and adjustable heights to maximize storage capacity and accessibility.
• Create a customized spice rack station and shelf organizer systems tailored to your cooking needs and kitchen style.
• Incorporate under sink storage baskets to organize clutter, prevent water damage, and maintain a tidy sink area.
Repurposed Pallet Kitchen Shelves
You can breathe new life into discarded pallets by transforming them into functional kitchen shelves that add a touch of rustic charm to your culinary space. With a little creativity and some DIY skills, you can create unique storage solutions that also become a conversation starter.
Pallet renovation is an excellent way to upcycle old materials and reduce waste. To get started, collect sturdy pallets and disassemble them into individual planks. Sand and stain the wood to bring out the natural grain and add a warm, earthy tone.
Assemble the planks into shelves, and attach them to a wall or a freestanding frame. Add some decorative brackets or corbels to give your shelves a rustic flair. Fill your new shelves with cookbooks, vintage kitchenware, or potted herbs to create a cozy and inviting atmosphere.
With pallet kitchen shelves, you'll not only gain extra storage but also infuse your kitchen with a touch of rustic decor that's both functional and visually appealing.
DIY Drawer Dividers for Cabinets
Transforming cluttered kitchen cabinets into organized havens is a breeze with DIY drawer dividers that separate utensils, cookware, and dinnerware into designated compartments. You'll be amazed at how much more functional your kitchen becomes when everything has its own place.
Here's a snapshot of what you can create:
-
Custom Drawer Dividers: Design your own dividers to fit your specific kitchen needs. You can use wood, plastic, or even repurposed materials like old cardboard boxes.
-
Soft Close Drawer Organizer: Add a soft-close mechanism to your drawers to prevent them from slamming shut. This feature is especially useful if you have young children or pets who might accidentally slam the drawers.
-
Adjustable Compartments: Create adjustable compartments to accommodate items of different sizes. This guarantees that you can store everything from large serving platters to small spice jars in an organized and accessible way.
With DIY drawer dividers, you can create a custom storage system that suits your kitchen style and needs. Say goodbye to cluttered kitchen cabinets and hello to a more efficient, organized you!
Upcycled Mason Jar Storage
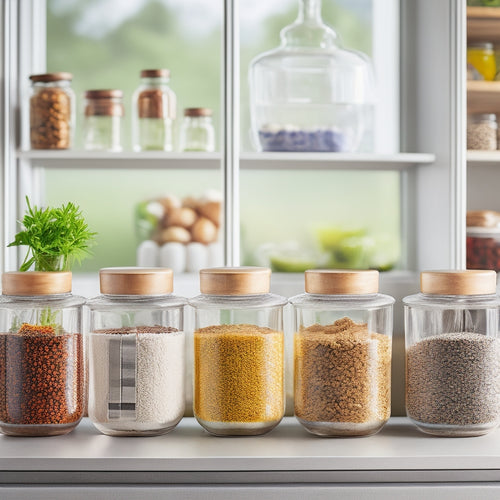
By repurposing mason jars, you can create a charming and functional storage solution that complements your kitchen's country charm or rustic vibe, while keeping spices, oils, or condiments within easy reach.
To give your jars a personalized touch, try adding Jar Decorations such as ribbons, labels, or paint to match your kitchen's aesthetic. For a Farmhouse Style look, consider distressing the jars or adding a vintage-inspired label.
Once you've decorated your jars, simply fill them with the items you want to store and place them on a shelf or countertop. You can also attach the jars to a wooden board or a metal rack to create a unique storage unit.
This upcycled storage solution isn't only eco-friendly but also adds a touch of warmth and personality to your kitchen. Plus, it's a great way to keep your countertops clutter-free and your kitchen organized.
With a little creativity, you can turn ordinary mason jars into extraordinary storage containers that reflect your personal style.
Build a Kitchen Cart With Shelves
With a kitchen cart featuring shelves, you'll gain valuable counter space and a convenient spot to store essentials, like cookbooks, utensils, and ingredients, while keeping them easily accessible.
Imagine having a mobile kitchen island that can be easily moved to wherever you need it, thanks to cart wheels that make it simple to reposition.
Here's a snapshot of what your kitchen cart with shelves could look like:
-
Tiers of storage: Multiple shelves to store cookbooks, utensils, and ingredients, keeping them organized and within reach.
-
Convenient countertop: A sturdy surface for food preparation, perfect for chopping, mixing, or displaying decorative items.
-
Easy mobility: Cart wheels that allow you to effortlessly move the cart to different areas of the kitchen, making it perfect for small kitchens or those with limited counter space.
Easy Shelf Liner Installation
You'll be amazed at how a simple shelf liner can safeguard your kitchen cart's shelves from spills and stains, making cleanup a breeze. Not only does it protect against damage, but it also makes maintenance a snap. Imagine wiping down a smooth surface instead of scrubbing away at stuck-on food residue.
To install a shelf liner, start by measuring your shelves to guarantee a perfect fit. Cut the liner to size using scissors or a utility knife, leaving a little extra around the edges for a snug fit. Peel off the backing and press the liner onto the shelf, smoothing out any air bubbles as you go. For a seamless look, trim the excess liner with a utility knife.
Remember to clean your shelf liner regularly to prevent dirt and grime from building up. A quick wipe with a damp cloth will keep your liner looking like new.
With your new shelf liner in place, you'll enjoy the benefits of shelf protection and easy liner maintenance, giving you more time to focus on what matters most – serving others with a warm and welcoming kitchen.
Create a Spice Rack Station
Now that you've got your shelves lined, it's time to think about the nitty-gritty of spice storage!
You'll want to contemplate the essentials of spice organization, like how many jars you need to store and how you'll keep them from getting jumbled.
From there, you can start brainstorming design ideas and setup tips to create a spice rack station that's both functional and visually appealing.
Spice Organization Essentials
How many times have you found yourself digging through a cluttered cabinet or drawer in search of that one specific spice, only to end up frustrated and disorganized? You're not alone!
A well-organized spice station can be a game-changer in the kitchen. To get started, consider these essential elements:
-
Spice Mapping: Take stock of your spices and group them by category (e.g., baking, savory, sweet). This will help you visualize your collection and identify any duplicates or gaps.
-
Flavor Profiling: Think about the flavor profiles you tend to use most often (e.g., Italian, Mexican, Indian). This will help you prioritize the spices you need to access quickly.
-
Easy Access: Design your spice station to make sure your most-used spices are front and center, while less frequently used spices are stored out of the way.
Spice Rack Design Ideas
Spice Rack Design Ideas
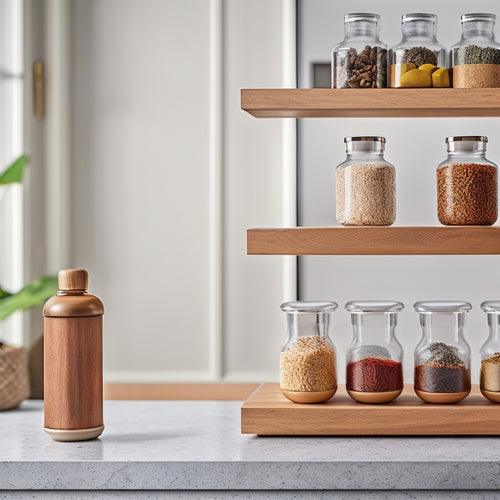
Design your spice rack station to be a visually appealing hub, where every jar and bottle is showcased like a work of art, making meal prep a breeze. Imagine a space that's both functional and stylish, where you can easily find the flavors you need to create delicious meals for your loved ones.
Here are some design ideas to get you started:
| Style | Materials | Features |
|---|---|---|
| Modern | Glass, Metal | Sleek lines, LED lights |
| Rustic | Reclaimed Wood, Twine | Distressed finish, Spice-themed labels |
| Coastal | Driftwood, Sea Glass | Natural textures, Beachy vibe |
Consider adding rustic accents, like wooden crates or vintage utensils, to give your spice rack station a unique character. You can also incorporate spice-themed decorations, such as a "Spice Route" sign or a collection of antique spice tins, to create a cohesive look. Remember, the key is to create a space that reflects your personal style and makes you happy!
Station Setup Tips
As you envision your ideal spice rack station, position it near a frequently used cooking zone, ensuring easy access to your favorite flavors while you're whipping up a storm. This strategic placement is key to creating an efficient workflow, allowing you to quickly grab the spices you need without disrupting your cooking flow.
To create a functional spice rack station, consider the following essential elements:
-
Countertop Space: Designate a specific area for your spice rack, ensuring it's large enough to accommodate your collection.
-
Easy-Reach Shelves: Install shelves or a carousel that allows you to easily access your spices without having to dig through a cluttered cabinet.
-
Task Lighting: Add under-cabinet lighting or a pendant light above your spice rack to illuminate the area, making it easier to read labels and find the perfect spice.
DIY Floating Kitchen Shelves
Now that you've tackled your spice rack station, it's time to think about making the most of your kitchen's vertical space with DIY floating kitchen shelves.
You'll be amazed at how these sleek, wall-mounted shelves can maximize your storage capacity while keeping your countertops clear.
Shelf Space Maximization
By installing DIY floating kitchen shelves, you can utilize valuable real estate in your kitchen, creating a sleek and modern look while maximizing your shelf space. This is especially important in kitchens with limited floor space, where every inch counts.
Here are some ways to maximize your shelf space with DIY floating kitchen shelves:
-
Corner optimization: Use corner shelves to make the most of the often-wasted space in the corners of your kitchen. This is especially useful for storing infrequently used items, like special occasion dishes or cookbooks.
-
Vertical allocation: Consider installing shelves that go all the way up to the ceiling to make the most of your kitchen's vertical space. This is perfect for storing items that you don't use frequently, like seasonal decorations or out-of-season cookware.
-
Open shelving: Use open shelving to create a sense of airiness and make it easy to access your kitchen essentials. This is especially useful for storing frequently used items, like plates, bowls, and cups.
Easy Installation Methods
You'll be thrilled to discover that installing DIY floating kitchen shelves is a breeze, thanks to simple and clever installation methods that make the process a whole lot easier. With the right tools and a little patience, you'll be enjoying your new shelves in no time.
One of the most popular installation methods is using Quick Mounts, which provide a secure and level surface for your shelves. These mounts are easy to install and require minimal hardware, making them a great option for DIYers of all skill levels.
Another option is to use Simple Fasteners, which are designed to blend seamlessly into your kitchen decor. These fasteners are easy to conceal, giving your shelves a sleek and streamlined appearance. Plus, they're incredibly easy to install, requiring only a few screws and a drill.
With either of these methods, you'll be able to achieve a professional-looking result without the hassle and expense of hiring a contractor. So why wait? Get started on your DIY floating kitchen shelves today and enjoy the extra storage and style they bring to your kitchen!
Customizable Shelf Organizer System
Within the confines of your kitchen, a customizable shelf organizer system can transform cluttered shelves into a visually appealing and functional space that adapts to your unique storage needs. Imagine having a system that grows with you, adapting to your changing storage requirements. With adjustable heights and modular components, you can create a tailored solution that fits your kitchen's unique layout.
Here are three ways a customizable shelf organizer system can benefit your kitchen:
-
Flexibility: Modular components allow you to add or remove shelves as needed, ensuring your storage system evolves with your kitchen's changing needs.
-
Efficient use of space: Adjustable heights enable you to maximize vertical storage, making the most of your kitchen's available space.
-
Personalization: With a customizable system, you can design a storage solution that fits your kitchen's unique style and aesthetic, creating a visually appealing space that reflects your personal taste.
Under Sink Storage Baskets Tutorial
As you stand in front of your kitchen sink, you're probably thinking about how to make the most of that awkward space underneath.
You're about to learn how to create under sink storage baskets that will corral clutter and make the area feel more spacious.
Secure the Sink Area
Let's get started on maximizing the often-wasted space under your sink by installing storage baskets that'll keep essentials within easy reach.
Imagine having a clutter-free sink area where you can easily find what you need without digging through a messy cabinet.
By securing the sink area, you'll prevent sink clutter and potential water damage that can lead to costly repairs.
Here's a snapshot of what you'll achieve:
-
Easy access: Store frequently used items like dish soap, scrubbers, and sponges in convenient baskets.
-
Water protection: Keep items away from water splashes and potential leaks, preventing damage to your sink cabinet.
-
Visual calm: Enjoy a tidy sink area that's a pleasure to work in and adds to your kitchen's overall aesthetic.
Maximizing Hidden Space
Install under-sink storage baskets to carve out a functional haven beneath your sink, where you can stash essentials like cleaning supplies, trash bags, and extra paper towels. This clever DIY project will help you maximize hidden space, turning a cluttered area into a tidy zone.
You'll be amazed at how much you can fit in these under-sink storage baskets, freeing up valuable counter space for more important things.
As you work on this project, think vertically – those hidden corners and vertical spaces are just begging to be utilized! By installing these baskets, you'll create a seamless storage solution that keeps your sink area organized and out of sight.
No more messy countertops or lost cleaning supplies; everything will have its designated spot. Plus, the sleek design of these baskets will blend in seamlessly with your kitchen's aesthetic.
With this DIY project, you'll be serving up a more efficient kitchen in no time!
Kitchen Utensil Holder From Wood
With a few simple cuts and some clever design, you can create a kitchen utensil holder from wood that keeps your countertops clutter-free and your tools within easy reach. This holder is perfect for storing your frequently used utensils, such as spoons, spatulas, and whisks, in a way that showcases their beauty while keeping them organized.
Here's a sneak peek at what your finished project could look like:
-
A rectangular block of wood with a smooth, natural wood grain finish, mounted on a wall or placed on a countertop.
-
A series of neatly categorized utensil slots, each one carefully crafted to fit a specific type of tool, from long-handled spoons to compact whisks.
-
A small lip or tray at the bottom of the holder, designed to catch any stray utensils or kitchen debris, keeping your countertops spotless.
Frequently Asked Questions
Can I Use MDF Instead of Plywood for My DIY Kitchen Shelves?
You're wondering if MDF is a viable substitute for plywood in your DIY kitchen shelves. While MDF benefits from being denser and cheaper, its drawbacks include moisture sensitivity and lack of durability, making plywood a better choice for heavy kitchen use.
How Do I Protect My DIY Storage Projects From Moisture Damage?
As you build your DIY storage projects, imagine a shield protecting them from the silent enemy - moisture. You'll be the hero, safeguarding against water damage by applying moisture barriers, ensuring your creations stand strong against the test of time.
What Is the Best Finish to Use for Kitchen Storage Made From Wood?
When choosing a finish for your kitchen storage made from wood, you'll want to contemplate a water-resistant option that preserves the natural wood tone. Run a durability test to make sure the finish you select can withstand kitchen humidity and spills.
Can I Customize DIY Storage Plans to Fit My Specific Kitchen Layout?
You can definitely customize DIY storage plans to fit your kitchen's unique layout limitations. With design flexibility, you'll be able to adjust shelves, cabinets, and countertops to maximize space and flow, creating a functional and beautiful kitchen that serves you and your loved ones.
Are DIY Kitchen Storage Projects Suitable for Renters or Just Homeowners?
You're wondering if DIY kitchen storage projects are suitable for renters or just homeowners? Absolutely, you can find rent-friendly solutions that work within lease limitations, so don't let renting hold you back from organizing your kitchen space!
Related Posts
-

Modern Countertop Spice Organizer Designs
Modern countertop spice organizer designs enhance your kitchen's aesthetics while maximizing functionality. These spa...
-

Stackable Kitchen Containers for Dry Goods
Stackable kitchen containers are perfect for organizing dry goods and maximizing your kitchen space. They help reduce...
-

Creating More Space in a Tiny Kitchen
You can alter your tiny kitchen into a more spacious haven by utilizing smart storage solutions. Install wall-mounted...


