
10 Budget-Friendly DIY Kitchen Organization Hacks
You can turn your cluttered kitchen into a haven of organization and efficiency without breaking the bank. Repurpose old furniture into functional kitchen organizers, like a dresser-turned-kitchen-island or a bookshelf-turned-spice-rack. Utilize vertical storage spaces with shelves, hooks, and magnetic boards. Maximize corner cabinet space with carousel units and lazy susans. Create a DIY spice rack on a budget using materials like magnetic strips or reclaimed wood. And, upcycle old mason jars into storage containers. With these budget-friendly DIY kitchen organization hacks, you'll be well on your way to a clutter-free kitchen that sparks joy - and there's more where that came from!
Key Takeaways
• Repurpose old furniture into functional kitchen organizers, such as turning an old dresser into a kitchen island or spice rack, to save money and reduce waste.
• Utilize vertical storage spaces by installing shelves, hooks, or magnetic boards to maximize kitchen storage and keep countertops clutter-free.
• Create a DIY spice rack using materials like magnetic strips, reclaimed wood, or upcycled picture frames to add a personal touch to the kitchen on a budget.
• Optimize kitchen utensil storage by repurposing mason jars, tin cans, or using magnetic strips to store metal utensils within easy reach.
• Build a mobile kitchen cart station using repurposed or upcycled materials to streamline meal prep, add counter space, and improve workflow.
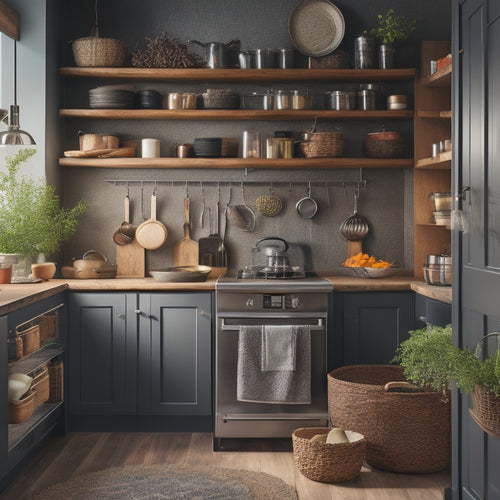
Repurpose Old Furniture Creatively
Transforming old furniture into functional kitchen organizers not only reduces waste but also adds a touch of personality to your cooking space. You can give new life to that old dresser or bookshelf by repurposing them into creative storage solutions.
For instance, an old dresser can be converted into a kitchen island with built-in storage for utensils, pots, and pans. You can also upcycle an old bookshelf into a spice rack or a wine bar. This furniture revival not only saves you money but also helps reduce waste, making it an eco-friendly option.
With some creative upcycling, you can turn almost any piece of old furniture into a functional kitchen organizer. Get creative with paint, hardware, and other decorative elements to give your upcycled piece a unique look that reflects your personal style.
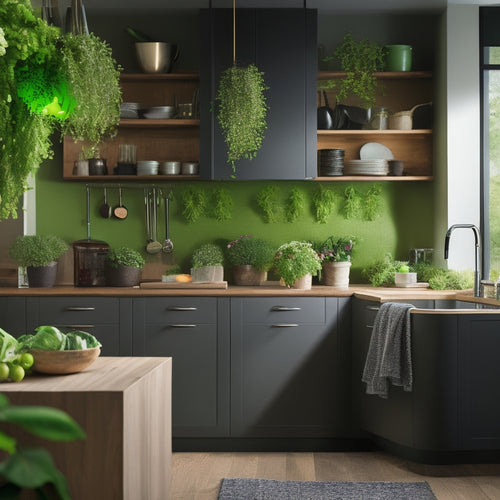
Utilize Vertical Storage Spaces
Now that you've given new life to old furniture, it's time to maximize your kitchen's often-wasted vertical spaces. You can install shelves, hooks, or magnetic boards to store items like infrequently used cookbooks, specialty utensils, or spices, keeping them easily accessible yet out of the way.
By utilizing wall shelving, you can create a visually appealing display for your favorite cookbooks or decorative kitchenware. Consider installing adjustable shelves to accommodate items of varying sizes.
Ceiling hooks are another great option for hanging pots, pans, or utensils, freeing up valuable cabinet space. You can also use adhesive hooks or a pegboard to hang items like oven mitts, aprons, or even a kitchen utensil organizer.
When choosing your vertical storage solutions, remember to measure your space carefully and select items that fit your kitchen's unique style and needs. By making the most of your kitchen's vertical spaces, you'll create a more organized, functional, and beautiful space that's perfect for serving others.
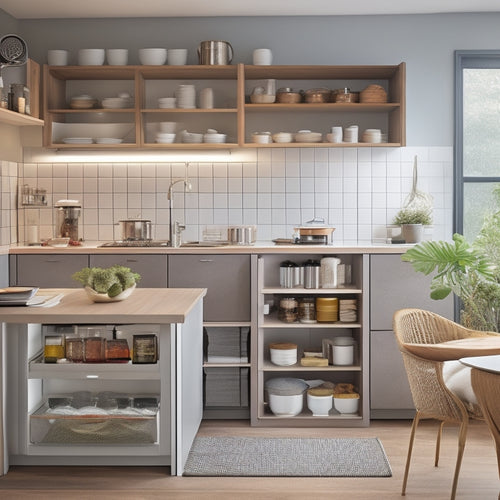
Maximize Corner Cabinet Space
You can turn the often-wasted corner cabinet space into a treasure trove of organized storage by installing carousel units, lazy susans, or tiered shelves that bring hard-to-reach items to your fingertips.
These clever solutions will make the most of the often-inefficient corner space, giving you easy access to your kitchen essentials.
Corner shelves, for instance, can be customized to fit your specific needs, providing a convenient spot for infrequently used items like special occasion dishes or cookbooks.
Cabinet carousels, on the other hand, are perfect for storing heavy or bulky items like pots and pans, keeping them organized and within reach.
By maximizing your corner cabinet space, you'll free up valuable real estate in your kitchen, making meal prep and cooking a breeze. Plus, you'll reduce clutter and stress, creating a more peaceful cooking environment.
DIY Spice Rack on a Budget
With a few simple materials and some creative thinking, you can whip up a functional spice rack that fits your kitchen's unique style and your wallet's tight constraints. Say goodbye to cluttered countertops and hello to a tidy and organized cooking space.
Here are some budget-friendly materials you can use to create your DIY spice rack:
-
Magnetic Strip: Attach it to a metal surface or the side of a cabinet to create a sleek and modern spice rack. Simply place your spice bottles on the strip, and voilà!
-
Reclaimed Wood: Upcycle an old wooden board or crate to create a rustic and charming spice rack. Add some decorative hooks or a small shelf to hold your spice bottles.
-
Repurposed Picture Frame: Transform an old picture frame into a unique and quirky spice rack. Simply attach small magnets or adhesive hooks to hold your spice bottles, and hang it on a wall or place it on a countertop.
With these creative ideas, you can create a DIY spice rack that not only saves you money but also adds a personal touch to your kitchen. So, get creative, and start organizing your spice bottles today!
Organize Kitchen Utensils Efficiently
Now it's time to tackle the jumble of kitchen utensils that's taking over your countertops and drawers.
You'll be amazed at how a few simple tweaks can transform your kitchen's functionality.
Utensil Holder Ideas
Maximize your kitchen's real estate by repurposing everyday items, like mason jars or old tin cans, into clever utensil holders that keep countertops clutter-free. You'll love the extra space and the satisfaction of upcycling.
Here are some creative ideas to get you started:
-
Attach magnetic strips to the side of a cabinet or fridge to store metal utensils, like whisks or spatulas, within easy reach.
-
Use adjustable inserts in a wooden utensil holder to customize the storage space for your specific kitchen tools.
-
Transform a vintage muffin tin into a charming holder for small items like paper clips, pushpins, or even beads.
Optimize Your Drawer Space
You can corral chaos in your kitchen drawers by assigning a home to each utensil, making meal prep a breeze and saving you time in the process. To optimize your drawer space, start by purging unnecessary items and grouping similar utensils together.
Next, install drawer dividers to separate and categorize your items. This will prevent clutter from building up in the future.
Consider investing in soft-close drawers or upgrading your existing ones to guarantee a smooth and quiet operation. This feature will make it easier to open and close your drawers, reducing the likelihood of utensils falling out or getting damaged.
Once you've organized your drawers, maintain your system by putting utensils back in their assigned spot after each use. You can also label each divider or section to help you and others quickly find what they need.
Create a Chalkboard Menu Board
What's the easiest way to keep your family's meal plans and grocery lists in check, while also adding a touch of rustic charm to your kitchen? By creating a chalkboard menu board, of course! This DIY project is a game-changer for busy home cooks who want to stay organized and on top of their meal prep.
Here are just a few benefits of having a chalkboard menu board:
-
Easy meal planning: Write down your weekly meal plans and keep track of what you need to buy at the store.
-
Grocery list central: Jot down the ingredients you need to pick up and check them off as you go.
-
Rustic charm: Add a touch of vintage style to your kitchen with a distressed or decorative chalkboard frame.
With a chalkboard menu board, you'll be able to stay on top of your menu planning and meal prep in no time. Plus, it's a great way to add some personality to your kitchen decor. So why not give it a try? You won't regret it!
Upcycle Old Mason Jars
Now it's time to breathe new life into those old mason jars you've got stored away!
You'll be amazed at how easily they can be transformed into clever storage containers with a little creativity.
Jar Labeling Ideas
Transforming old mason jars into functional storage containers starts with labeling them, and a few creative ideas can elevate this task from mundane to magnificent. You can turn this simple task into an opportunity to add a personal touch to your kitchen organization.
Here are some jar labeling ideas to get you started:
-
Mix and match label fonts: Combine bold fonts with cursive scripts to add visual interest to your labels. You can use a bold font for the main label and a cursive script for the description.
-
Add a decorative touch: Use washi tape, stickers, or paint to add a pop of color and personality to your labels. This is a great way to incorporate your personal style into your kitchen decor.
-
Use a chalkboard label: Write the contents of the jar in chalk and easily erase it when you need to update the label. This is a great option for jars that hold ingredients with changing quantities.
Storage Capacity Boost
You can multiply the storage capacity of your kitchen by upcycling old mason jars into functional storage containers that hold everything from spices to baking supplies. This DIY hack is a game-changer for maximizing your kitchen's storage potential. With a little creativity, you can turn these humble jars into flexible storage solutions that fit your unique needs.
Here are some ideas to get you started:
| Storage Idea | What to Store | Benefits |
|---|---|---|
| Spice Jar | Spices, herbs, and seasonings | Easy access to frequently used spices, keeps countertops clutter-free |
| Baking Supply Container | Flour, sugar, and baking powder | Keeps baking essentials organized, makes measuring a breeze |
| Utensil Holder | Whisks, spatulas, and wooden spoons | Keeps countertops clear, makes cooking utensils easy to find |
Build a Kitchen Cart Station
By repurposing an old cart or building one from scratch, you can create a mobile kitchen station that streamlines meal prep and adds valuable counter space. This DIY project is perfect for optimizing your kitchen layout and cart design. With a kitchen cart station, you'll have more room to chop, dice, and cook, making meal prep a breeze.
Here are some benefits to take into account:
-
Increased counter space: Add a butcher-block top or a granite countertop to provide extra room for food preparation.
-
Improved workflow: Position your cart near a kitchen island or peninsula to create a functional workstation.
-
Enhanced storage: Incorporate drawers, shelves, or baskets to store kitchen essentials, such as utensils, spices, or cookbooks.
Install Shelf Dividers Easily
When you install shelf dividers, you're not just organizing your kitchen - you're optimizing it. By creating separate spaces for your cookbooks, dinnerware, and snacks, you'll maximize shelf space and make the most of your kitchen's real estate.
Now, let's get started on customizing your divider size to fit your unique kitchen needs!
Maximize Shelf Space
Shelf dividers transform cluttered kitchen shelves into tidy storage spaces, allowing you to corral related items and find what you need at a glance. By installing shelf dividers, you'll create separate zones for different types of kitchen essentials, making meal prep and cooking a breeze.
Here are some ways to maximize shelf space with dividers:
-
Double up with shelf tiers: Add a second tier to your shelves to double your storage capacity. This is especially useful for infrequently used items or special occasion dishes.
-
Label it up: Use shelf labels to identify what's stored behind each divider. This helps you (and your family members) quickly locate what you need.
-
Divide and conquer: Separate cooking utensils, baking supplies, and dinnerware into distinct categories, making it easy to find what you need when you need it.
Customize Divider Size
Customize Divider Size (Install Shelf Dividers Easily)
You can create customized shelf dividers that fit your kitchen's unique needs by measuring your shelves and cutting dividers to size. This way, you can guarantee a perfect fit and make the most of your shelf space. To avoid measuring mistakes, take your time and double-check your measurements before cutting your dividers.
Here's a simple guide to help you get started:
| Shelf Type | Divider Size | Tips |
|---|---|---|
| Fixed shelves | Measure shelf width | Use a level to ensure straight cuts |
| Adjustable shelves | Measure shelf width at multiple points | Consider using adjustable inserts |
| Corner shelves | Measure shelf width and depth | Cut dividers at an angle for a snug fit |
Design a Pegboard Storage Wall
By repurposing a small section of your kitchen wall, you can create a pegboard storage system that maximizes vertical space and keeps your countertops clutter-free. This DIY project is a game-changer for kitchen organization, and it's easier than you think!
With a pegboard, you can hang frequently used items like utensils, pots, and pans, freeing up cabinet space and reducing clutter.
To get started, plan your pegboard layout by considering the items you want to store and the space available. You can also integrate a toolbox into your design for added functionality.
Here are some tips to keep in mind:
- Choose a pegboard with holes spaced 1 inch apart for maximum versatility
- Use hooks and bins of various sizes to accommodate different items
- Consider adding a shelf or baskets for extra storage and display space
Frequently Asked Questions
How Do I Determine the Best DIY Project for My Kitchen's Specific Needs?
To determine the best DIY project for your kitchen, you'll start by conducting a thorough kitchen assessment and space analysis, identifying areas that need improvement, and prioritizing tasks based on your specific needs and goals.
What Are Some Budget-Friendly Alternatives to Expensive Organizational Tools?
Instead of breaking the bank, you're opting for wallet-friendly solutions! Consider repurposing materials like old crates or jars, and scouring thrift stores for hidden gems to create unique organizational tools that are both functional and budget-friendly.
Can I Customize DIY Projects to Fit My Personal Kitchen Style?
You can totally customize DIY projects to fit your personal kitchen style, incorporating your unique kitchen aesthetic and adding personal flair through creative materials, colors, and designs that reflect your taste and personality.
How Long Do DIY Kitchen Organization Projects Typically Take to Complete?
You'll be surprised to know that 70% of DIYers complete projects in under 5 hours! When planning your kitchen organization project, expect a timeline of 2-5 hours, perfect for Weekend Warriors like you, who can tackle it in a single weekend.
Are DIY Kitchen Organization Projects Suitable for Renters or Small Kitchens?
You'll find that DIY kitchen organization projects are perfect for renters and small kitchens, thanks to rent-friendly solutions and space-conscious designs that maximize storage without compromising style or functionality.
Related Posts
-
Rechargeable Under-Cabinet Lighting for Sustainable Kitchens
Rechargeable under-cabinet lighting is ideal for your sustainable kitchen. You'll enjoy energy efficiency with LED te...
-
Over-The-Door Kitchen Storage for Apartment Living
Over-the-door kitchen storage is a smart solution for apartment living, allowing you to maximize vertical space while...
-
Space-Saving Kitchen Solutions for Busy Homeowners
To maximize your kitchen's potential, start with vertical storage solutions like wall-mounted shelves and pegboards f...


