10 Best Kitchen Pantry Storage Hacks You Need
Share
You're just a few clever hacks away from transforming your kitchen pantry into a sleek, stress-free space where every item has its place and is easy to find. Start by maximizing vertical storage space with racks and baskets, and utilize the back of doors for extra storage. Assign zones for categories, label everything clearly, and store heavy items below for stability. Implement a 'First In' system to prioritize oldest items, and keep seldom-used items up high. Designate a snack station for efficient meal prep, and incorporate baskets and containers to keep things organized. Now, get ready to uncover even more genius ideas to take your pantry to the next level.
Key Takeaways
• Assign zones for specific item categories and use clear labeling for quick identification and retrieval.
• Utilize back of doors, vertical spaces, and narrow shelves to maximize storage and keep frequently used items accessible.
• Implement a 'First In' system and label shelves with categories and stocking dates to ensure older items are used first and reduce waste.
• Group similar items together in designated baskets or containers, and label each for easy recognition and efficient stock rotation.
• Consider unique storage solutions like lazy Susans, turntables, and pulley systems to optimize pantry space and accessibility.
Maximize Vertical Storage Space
How can you squeeze every last inch of storage out of your kitchen pantry without sacrificing accessibility or aesthetics?
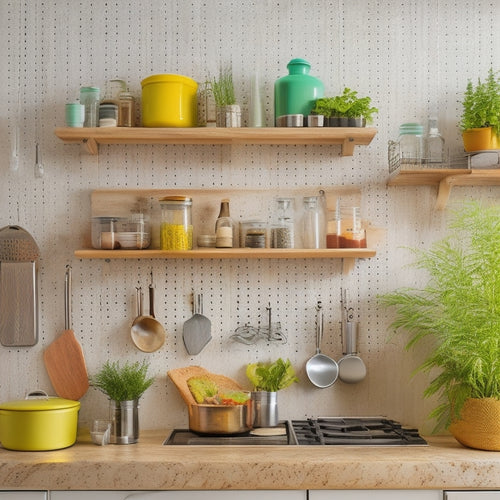
One effective way is to maximize your vertical storage space. By installing vertical spice racks, you can store your spices, oils, and condiments within easy reach while keeping them organized and out of the way. This is especially useful for narrow pantry shelves where horizontal storage can be limited.
Another great option is to use hanging baskets. These can be attached to the ceiling or walls, providing additional storage for items like snacks, fruits, or vegetables. Hanging baskets are also a great way to keep your pantry floor clear, reducing tripping hazards and making it easier to clean.
Utilize Back of Doors
Don't let the back of your pantry doors go to waste - turn them into valuable storage real estate by attaching adhesive hooks, baskets, or shelves that can hold everything from aprons to zip-top bags.
This DIY storage solution is a great way to keep your pantry organized and clutter-free. You can hang your most-used items, like oven mitts or spice jars, within easy reach.
For a more creative organization approach, consider attaching a shoe organizer or a magazine rack to store snacks, spices, or cookbooks.
Assign Zones for Categories
You can create a more functional pantry by dividing it into zones dedicated to specific categories of items, such as baking supplies, canned goods, or snacks. This approach helps you find what you need quickly and prevents clutter from building up.
Start by grouping similar items together, like all your spices or oils, and then assign a specific zone for each group. For instance, you can designate a shelf for breakfast items, another for snacks, and a corner for cooking essentials.
To take your organizing to the next level, consider color coding your zones. Use baskets, bins, or labels in different colors to distinguish between categories. This visual cue will help you and your family members quickly identify where items belong.
Additionally, sorting items within each zone by frequency of use or expiration date can further streamline your pantry. By assigning zones for categories, you'll be able to maintain your pantry's organization with ease and make meal prep a breeze.
Label Everything Clearly
Now that you've assigned zones for categories, it's time to elevate your pantry organization by labeling everything clearly.
You'll want to identify key categories, such as 'Baking' or 'Snacks,' and use clear font styles that are easy to read.
Identify Key Categories
Organizing your kitchen pantry storage starts with categorizing items into clear groups, which enables you to label everything clearly and create a system that's easy to navigate.
You'll want to identify key categories that make sense for your kitchen, such as baking supplies, snacks, canned goods, and cooking essentials.
Once you've grouped similar items together, you can start thinking about container organization and space-saving solutions. For example, you might use stackable containers to store dry goods like pasta and rice, or install shelf dividers to keep similar items separated.
Consider creative storage ideas like using the back of a door or the inside of a cabinet for additional storage.
By categorizing and grouping your items, you'll be able to see what you have and where it's located, making meal planning and cooking a breeze.
You'll also reduce clutter and make the most of your pantry space, creating a safer and more efficient kitchen environment.
Use Clear Font Styles
With your categories in place, labeling everything clearly becomes the key to maintaining your newly organized kitchen pantry, and that starts with using clear font styles that make it easy to identify what's inside each container or on each shelf.
You want to make sure that you can quickly spot what you need, without having to dig through everything. This is especially important in a kitchen, where safety and efficiency are essential.
To achieve clear organization and a clutter-free space, follow these labeling tips:
- Use a bold, sans-serif font to make labels easy to read
- Choose a font size that's large enough to be seen from a distance
- Keep labels concise and to the point, avoiding unnecessary words
- Use a consistent labeling style throughout your pantry to create a sense of cohesion
- Consider using a label maker or writing labels by hand in a clear, cursive script
Store Heavy Items Below
When organizing your pantry, you're probably thinking about how to maximize your space.
You'll want to store your heaviest items, like canned goods and appliances, on the bottom shelves to guarantee stability and safety.
Heavy Items on Bottom
How do you guarantee that your pantry shelves remain sturdy and intact, despite the weight of your kitchen essentials? The key is to store heavy items on the bottom shelf, ensuring even weight distribution and organization. This simple hack prevents shelves from bowing or collapsing under the weight of heavy jars, cans, or appliances.
Here are some benefits of storing heavy items on the bottom:
-
Shelf stability: Heavy items on the bottom provide a solid foundation, reducing the risk of shelves tipping or collapsing.
-
Pantry layout: By storing heavy items at the bottom, you can create a more functional pantry layout, with lighter items easily accessible on higher shelves.
-
Safety: Storing heavy items on the bottom reduces the risk of accidents, as they're less likely to fall and cause injury or damage.
-
Accessibility: With heavy items on the bottom, you can easily access lighter items on higher shelves, without straining or struggling.
-
Aesthetics: A well-organized pantry with heavy items on the bottom creates a visually appealing space that's both functional and safe.
Floor Space Is Precious
You can maximize your pantry's floor space by storing heavy items, like bulky appliances or large containers, below the shelves or on the floor, keeping them out of the way while maintaining easy access.
This pantry organization hack is especially essential in small kitchens where every inch counts. By storing heavy items below, you'll free up valuable space on your shelves for lighter, more frequently used items.
Plus, this creative storage solution prevents clutter from building up and reduces the risk of accidents caused by heavy objects falling from high shelves.
Consider investing in stackable bins or baskets with wheels to make it easy to slide them in and out from under the shelves. This space-saving strategy will keep your pantry organized, safe, and functional.
Easy Accessibility Matters
Storing heavy items beneath shelves guarantees that they're easily reachable, allowing you to swiftly grab what you need without straining your back or risking accidents. This simple hack is a game-changer for your kitchen pantry storage, as it ensures that you can access the items you need without putting yourself in harm's way.
Here are some additional accessibility solutions to ponder:
-
Install pull-out shelves or drawers to make it easy to access items in the back of your pantry
-
Use baskets or bins with handles to make it easy to lift and carry heavy items
-
Store frequently used items at eye level, so you don't have to strain to reach them
-
Consider a lazy Susan or turntable to make it easy to access items in corner shelves
-
Label your shelves and storage containers, so you can quickly find what you need
Invest in Adjustable Shelves
Adjustable shelves can be tailored to fit your unique pantry storage needs, allowing you to maximize vertical space and accommodate items of varying sizes.
This is especially useful when you have different types of food and cooking supplies that require different storage configurations.
With adjustable shelves, you can create a customizable organization system that adapts to your changing needs.
Implement a "First In" System
When you implement a 'First In' system, you'll guarantee that your oldest pantry items are always front and center, making it easier to use them before they expire.
By placing these items in a visible spot, you'll be more likely to incorporate them into your meal planning, reducing waste and saving money.
As you start using this system, remember to clearly label your containers and rotate your stock regularly to keep your pantry organized and efficient.
Oldest Items Front
By implementing a 'first in, first out' system, you make sure that the oldest items in your pantry are front and center, making it easier to use them before they expire. This organizing technique is a space-saving solution that guarantees you're using the items that need to be consumed first, reducing food waste and keeping your pantry fresh.
Here are some tips to help you implement this system:
-
Store new items behind existing ones to maintain the 'first in, first out' order.
-
Keep a 'use by' list on your fridge or pantry door to track expiration dates.
-
Designate a specific shelf or section for items that are near expiration.
-
Consider using baskets or bins with clear labels to categorize items by type and expiration date.
-
Rotate your stock regularly to make certain that older items are moved to the front and newer items are stored behind.
Use Labels Clearly
To maintain a seamless 'first in, first out' system, you'll want to label each shelf, basket, or bin with not only the category of items it holds, but also the date you stocked it, so you can easily identify which items need to be consumed first. This labeling system will help you keep track of your pantry inventory and guarantee that older items don't get lost in the back of the shelf. By including the date, you can prioritize which items to use first, reducing the risk of expired or spoiled food.
A well-organized label system will also help you quickly locate specific items, saving you time and frustration. Consider using a label maker or stickers to categorize your items, such as 'Baking Supplies' or 'Canned Goods.' You can also use color-coding to differentiate between types of items or expiration dates.
Rotate Stock Often
You'll prevent older items from getting buried in the pantry by adopting a 'first in, first out' rotation system, where you regularly shift newer purchases to the back and bring older ones to the front. This simple habit guarantees that older items don't expire or go bad, and you get to enjoy your food before it's too late.
To implement this system effectively, follow these tips:
-
Set a reminder to regularly assess the pantry's contents and rearrange items accordingly.
-
Store similar items together, making it easier to identify older items.
-
Keep a 'use by' list on the fridge or a pantry board to keep track of expiration dates.
-
Consider using a 'first in, first out' shelf or bin to make rotation a breeze.
-
Organize efficiently by grouping items by type, such as grains, canned goods, and snacks, making it easier to identify and use older items first.
Keep Seldom-Used Items Up High
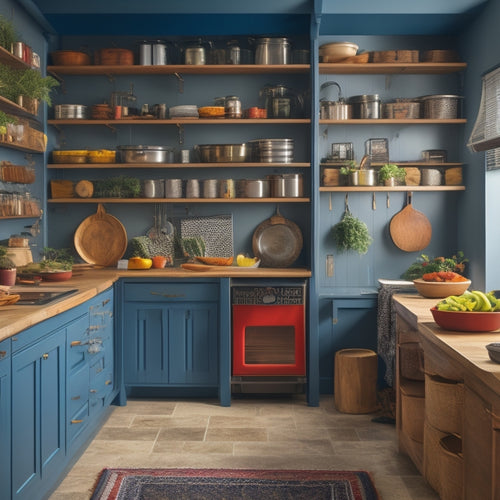
Your kitchen's highest shelves are prime real estate for stashing infrequently used items, freeing up valuable space for daily essentials. By storing seldom-used items up high, you'll create a more organized and functional kitchen.
To make the most of this vertical space, consider investing in ladder storage solutions that allow you to safely access items without straining or using a rickety ladder. You can also create hidden storage compartments by installing sliding shelves or pull-down storage units. These clever solutions keep items out of sight while keeping them easily accessible.
For even more storage potential, consider a pulley system that allows you to lift and lower hanging shelves with ease. This is especially useful for storing bulky or heavy items that are hard to manage. By keeping these items up high, you'll reduce clutter and create a more streamlined kitchen.
Plus, with the right storage solutions, you'll be able to find what you need quickly and safely, making meal prep and cooking a breeze.
Designate a Snack Station
By corralling snacks in a designated station, you can keep countertops clear and create a convenient hub for quick bites. A snack station is an excellent way to maintain snack organization and make mealtime more efficient. This DIY snack display can be customized to fit your kitchen's unique needs and style.
Here are some snack storage ideas to get you started:
-
Assign a specific shelf or cabinet for snacks to keep them out of sight but still accessible.
-
Utilize the back of a pantry door by installing a snack organizer or over-the-door storage rack.
-
Create a snack pantry solutions by designating a specific area for healthy snacks, such as a fruit bowl or a granola bar station.
-
Incorporate a lazy Susan to make it easy to access snacks without having to dig through an entire shelf.
-
Consider a snack cart or island with built-in storage to keep snacks organized and within reach.
Incorporate Baskets and Containers
To maximize your pantry's storage potential, incorporate baskets and containers that are specifically designed to hold and organize kitchen staples, keeping them visible, accessible, and dust-free. This will help you maintain a clutter-free pantry and lessen the risk of expired or spoiled food.
When selecting baskets and containers, consider the type of items you need to store. For instance, use shallow baskets for snacks and deep containers for dry goods like pasta or rice. Label each basket or container so you can easily recognize what's inside. This will save you time and effort when searching for a specific item.
Implementing a container organization system on your shelves will also help keep your pantry organized. Group similar items together, such as baking supplies or breakfast essentials, and store them in designated baskets or containers. This shelf organization strategy will keep your pantry tidy and make sure that everything has its designated place.
Frequently Asked Questions
How Do I Prevent Pantry Moisture From Affecting Stored Food?
Imagine your pantry as a damp, dark cave, threatening to ruin your food stash. You prevent this by placing a dehumidifier strategically, ensuring ventilation, and storing items in airtight containers with silica packets to absorb excess moisture.
Can I Customize Pantry Storage for a Small Kitchen?
You can customize pantry storage for your small kitchen by incorporating space-saving solutions like slide-out baskets and installing customized shelves that maximize vertical storage, ensuring easy access to your food and keeping it safe.
Are Stackable Containers Better Than Hanging Organizers?
When choosing between stackable containers and hanging organizers, you'll find that stackable containers, like wire baskets and shelves, offer more flexibility, while hanging organizers provide easy access. Consider a mason jar with labels for a stylish touch.
How Often Should I Clean and Reorganize My Pantry?
"Oh, you're asking how often to clean and reorganize your pantry? Ha! You're probably still searching for that can of beans from 2018. Seriously, aim to tidy up every 3-6 months to maintain pantry organization and follow simple cleaning tips like wiping down shelves and tossing expired goods."
Can I Use Pantry Storage Ideas for Other Rooms in My Home?
You're wondering if those clever pantry storage ideas can be used elsewhere in your home? Absolutely! You can adapt them for bathroom organization, living room storage, bedroom shelving, and even garage solutions to create a more organized and safe space.
Related Posts
-

Stylish Pegboard Storage for Open Kitchen Concepts
Stylish pegboard storage can completely enhance your open kitchen concept, merging practicality with contemporary fla...
-

Space-Efficient Dish Racks for Tiny Homes
Space-efficient dish racks are a game changer for tiny homes. By utilizing vertical storage, you can free up signific...
-

Over-The-Door Kitchen Storage for Large Families
Over-the-door kitchen storage is a transformative solution for large families. It maximizes vertical space, keeping y...


