
Witch Finger Cookies (without food coloring!)
These Witch Finger Cookies use jam in place of food coloring for “blood” in these gory Halloween cookies. Post was updated in 2021 with new photos and a fantastic gluten-free option.
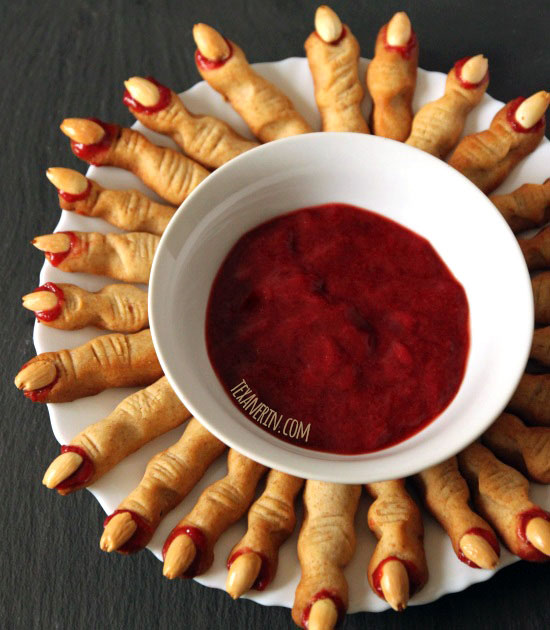
If you’re preparing for a Halloween party, these witch fingers are perfectly bewitching finger food. People freak out over them, so be sure to have plenty for everyone.
If you need a witches brew to serve alongside these cookies, you have to try this Halloween Punch with Eyeballs! The eyeballs are all-natural and made with lychees and blueberries.

Most all other witch finger cookie recipes that I have found use red decorating gel. Food coloring doesn’t normally bother me (even though it should), but the thought of eating red decorating gel makes me queasy.
I’ve struggled in the past to come up with Halloween desserts that are totally free of processed food, but I was ridiculously happy to have come across these, and decorating with strawberry jam makes these cookies bloody delicious.
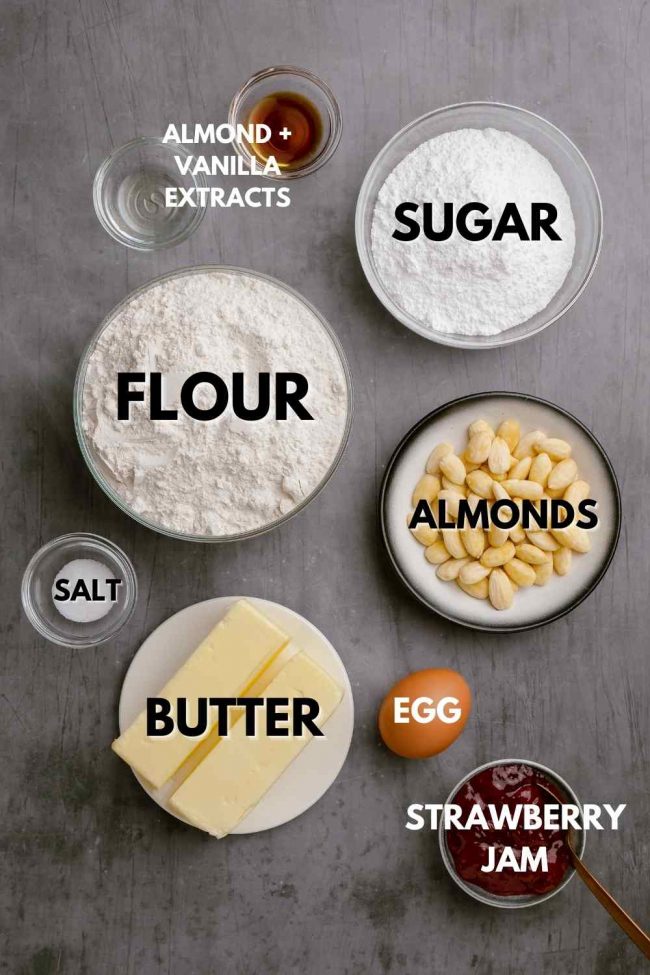
Ingredients:
-
Butter – subs won’t work. Coconut oil and other types of oil are 100% fat and would cause the fingers to spread and not hold their shape.
If you need a dairy-free recipe for Halloween, you could try this Vegan Pumpkin Cheesecake and top it with little spiders or pipe on a spiderweb. - Powdered sugar – I’ve only tried these with powdered sugar so can’t say for sure if they’d work if you sub in granulated sugar.
- Granulated sugar – optional! If you’re making these for adults who like not-very-sweet treats, then you don’t need it. If you’re making these for kids who are used to regularly sweetened treats, then you’ll definitely want to use the extra sugar.
- Egg – I don’t think an egg sub would work, though I could be wrong. You really need to follow the recipe 100% so that the cookies hold their shape perfectly.
- Vanilla and almond extracts – I just love almond extract with strawberry jam, but if you’re nut-free or don’t have almond extract, you can sub vanilla extract. I also think the almond extract adds a LOT to this recipe so please don’t omit it unless you really have to.
- Flour – you can use all-purpose flour or white whole wheat flour. Almond flour, coconut flour, gluten-free baking blends, etc. don’t work. But keep reading for a gluten-free version!
- Almonds – these are to create the fingernails. There are more ideas below.
-
Strawberry jam – this takes the place of red decorating gel. It’s all natual, plus it tastes way better than decorating gel! Raspberry jam would also be great but for the blood effect, but I think strawberry is better.
Make sure to use a jam that doesn’t have large chunks of strawberries in it. I guess you could if you want them to be messy and have the appearance of gross blood clots. It could also be an interesting way to have them all to yourself. :D. - Salt
Other fingernail ideas
I think blanched almonds are the best looking, but you could also use:
- Sunflower seeds for a nut-free option (if nut-free, also use vanilla in place of almond extract)
- Pepitas (pumpkin seeds) – not roasted pepitas but raw ones.
- Peanut halves
- Blanched sliced almonds
How to make Witch Finger Cookies:
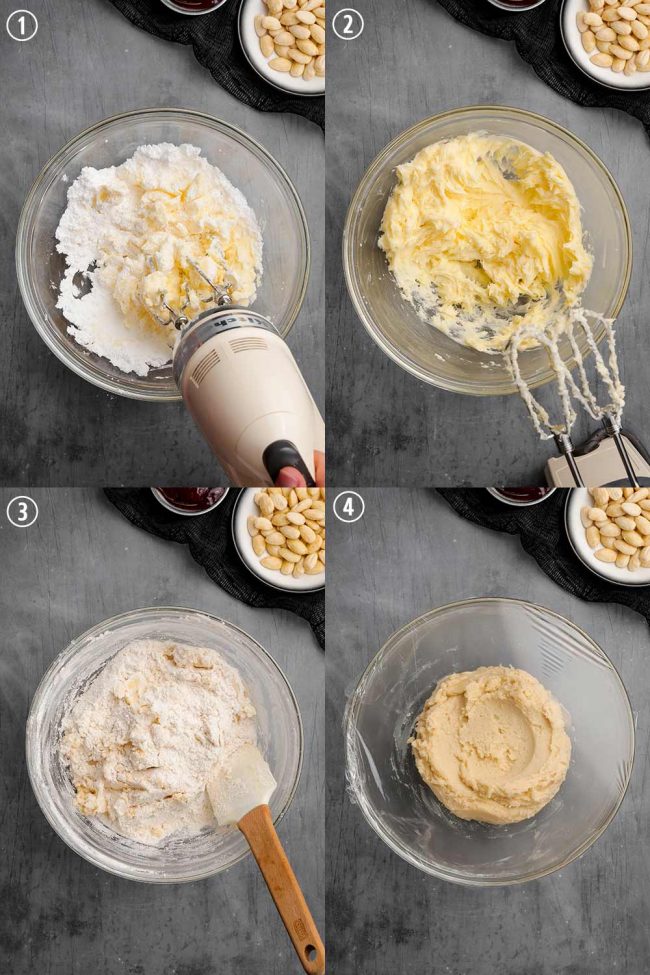
Make the dough. It’s a basic, easy cookie dough. You beat together the wet ingredients, then stir in the flour.
Cover with plastic wrap and refrigerate so that the witch fingers are easier to form and so that they hold their shape better in the oven.
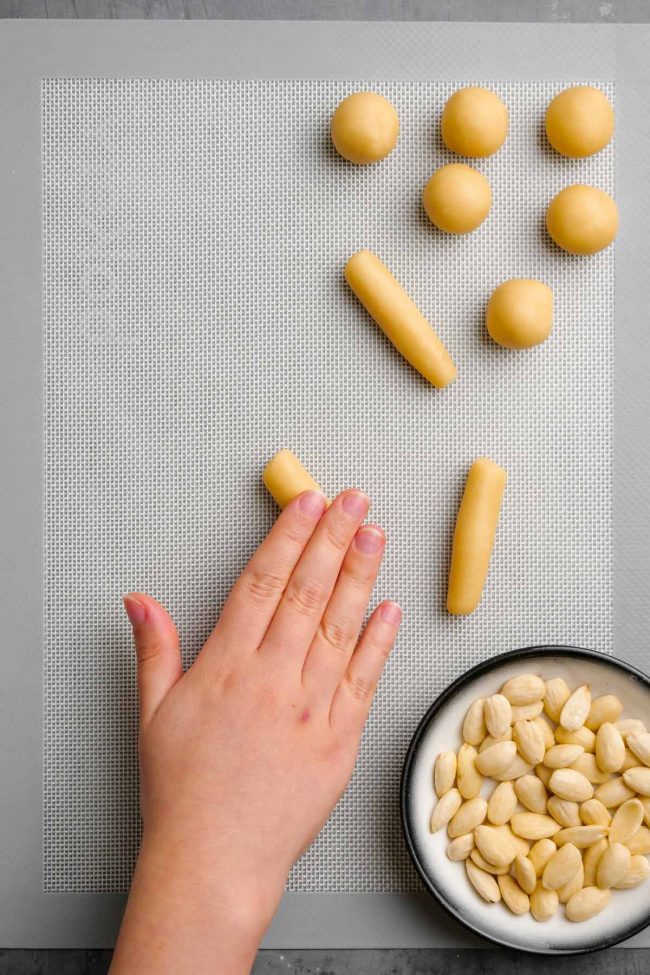
Roll out the fingers about the size of your pinky. The dough holds its shape pretty well in the oven but spreads a tiny bit. So if anything, make them a little thinner than you’d like them to look.
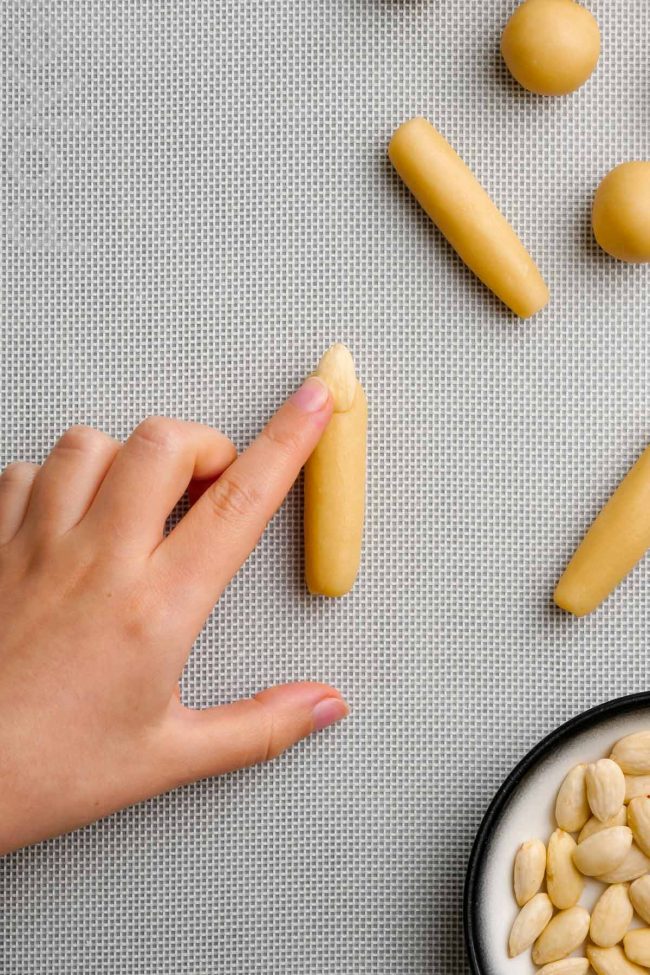
Press down the almond tip for the nails. If you don’t want to use almonds, use one of the above ideas.

Squeeze around the middle to form the knuckles. Use a sharp knife for the wrinkles in the knuckles and vary the length (which I forgot to do myself). That’ll create a more realistic finger.
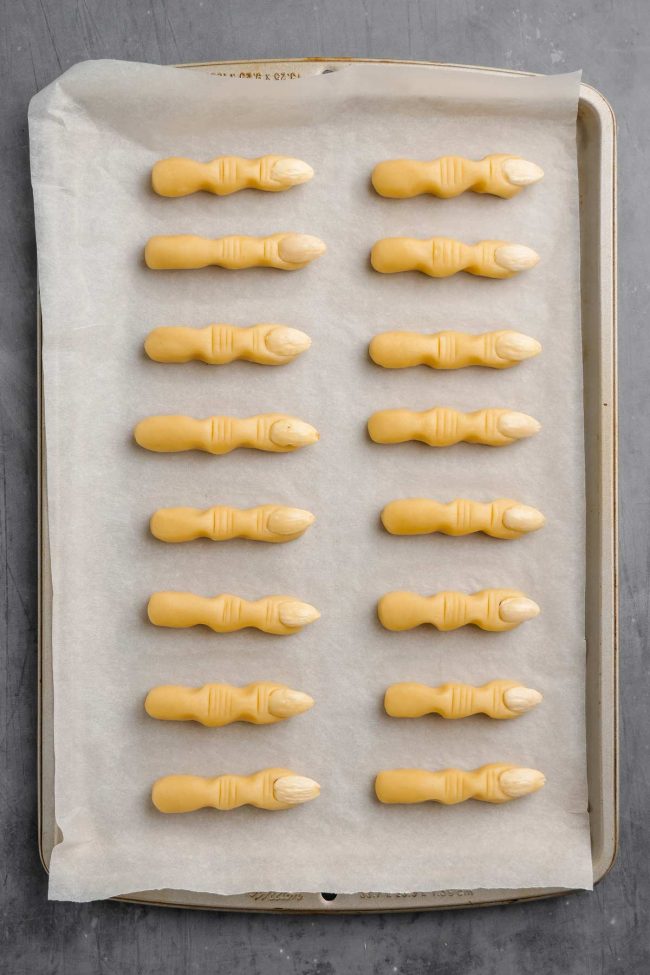
Place on a baking sheet and bake. Let them cool completely on the sheet.

Add the jam, plate and serve! Refrigerate any leftovers in an airtight container.

What do these cookies taste like?
These witch fingers are like a cross between shortbread and butter cookies, with a sable texture and imbrued with strawberry jam. They’re just slightly sweet (if you don’t add the extra granulated sugar) and have a great taste thanks to the almond extract.
I’m not a crunchy cookie kind of girl. I think out of all my cookie recipes, there’s only one other one that’s not chewy – these Whole Wheat Pepparkakor) (Swedish Ginger Cookies, like the brand Anna’s).
But with the added optional granulated sugar in this recipe, as I have quite a sweet tooth, I’m happy with these crisp cookies.
Can I just use any cookie dough recipe?
Unfortunately not. Most regular sugar cookie and shortbread recipes spread too much. I know because I’ve tried.
You need something that will hold its shape perfectly. If you’ve got a great recipe for shortbread fingers (the long rectangular-shaped cookies, not witch fingers ;)) that hold their shape, that would likely work.
I think a problem with sugar cookie dough, even if it forms great cut-out cookies, is that the fingers would be too compact and perhaps too fragile. It’s just a guess, though.
I just had the idea that this Almond Paste Cookies dough might work because if you look at the photos, you can see that they hold their shape quite well. But whether or not they hold their shape 100% perfectly, I don’t know.
That would make for some super tasty witch finger cookies, though!

What other type of flour can I use?
The ones in the pictures were made with all-purpose flour. I’ve also made them with white whole wheat flour.
Other gluten-free and grain-free flours will not work as a sub for the flour. I did come up with a fantastic gluten-free witch finger recipe, so keep reading for that.
Can I dye these green?
Yes! You can add 1/8 teaspoon of green food coloring to the wet ingredients before stirring in the dry ingredients.
Gel food coloring will give you the best, brightest green.
They do make natural green food coloring made from spinach and other vegetables. You can also make natural homemade food coloring. But be aware that the color of these cookies will be quite drab in comparison to cookies made with gel food coloring.
Can I make these in advance?
Yes! You can make the dough 2 days in advance.
You can also make the cookies, put them in an airtight container until near serving time. Then put them on the strawberry jam.
It’s also possible to put the jam on in advance, but then they need to be refrigerated.
I haven’t tried it, but I believe they’d also freeze well – even with the jam on there!

Gluten-free option
I’m thrilled to finally offer a gluten-free option for this recipe. And it’s actually delicious!
I spent foooorever trying to convert this recipe to be gluten-free. The results weren’t good.
If you just use a gluten-free baking blend in place of the all-purpose or white whole wheat flour, the cookies won’t have a great texture. They’ll be sandy, spread too much and form little cracks on the top.
I used Bob’s Red Mill 1-to-1 Gluten-free Baking Flour but am pretty confident you’d have the same results with other types of gluten-free flour.
I didn’t have much hope for my Almond Flour Sugar Cookies dough working to form these witches fingers, but I tried anyway. Those were some funky-looking ogre fingers.
So I tried different gluten-free shortbread recipes that I found, but I didn’t like any of them.
But I finally came up with a recipe that works. They don’t hold their shape 100% perfect like the wheat-based version, but they still look great.
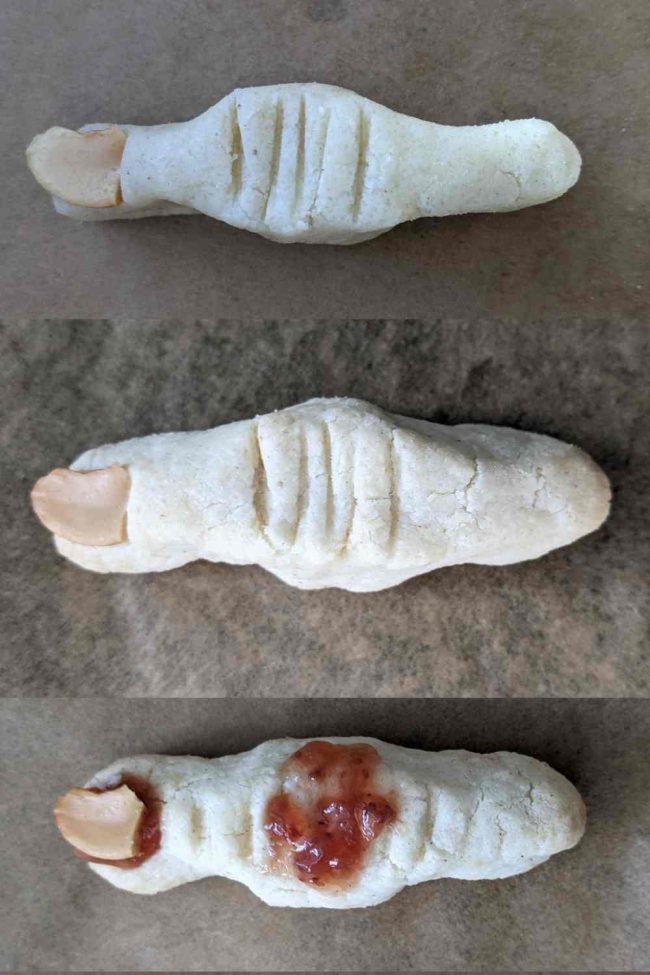
Here’s an ugly quick cell phone photo, just so you know what they look like. :) All I had at the last minute were some broken-up cashews. Almonds definitely look better!
If you google gluten-free witch fingers, you’ll see that absolutely all of the results have these little cracks in them. But they don’t make the cookies any less impressive!
The gluten-free version isn’t just the wheat version with gluten-free flour. It’s a totally different recipe.
The secret is almond flour! When using just a gluten-free baking blend, the cookies spread too much. If you add more flour to hopefully stiffen them up, the texture suffers.
Adding 2/3 cup of almond flour is just what was needed to firm them up and keep the taste great. There’s no sub for it so you really do need it for this recipe.
If you’re thinking you don’t want to buy it for just this recipe, I have loads of almond flour recipes that you could make with it.

More healthy Halloween desserts
- This Halloween Cake with Eyeballs was too freaky for some! I love the look it’s both elegant and eerie. If you can handle it, give it a stab and let me know what you think. With gluten-free and egg-free options.
- If you prefer individual desserts, these Eyeball Cupcakes are chocolaty and terrific. No worries, the eyeballs are made of canned lychees and blueberries, so all-natural! Gluten-free option.
- These Spider Cupcakes are a perfect addition to your trick or treats table. They have a pumpkin base and cream cheese frosting with gluten-free and vegan options.
- These little Monster Mouths are healthy and adorable. They’re made with fruit and kids just love them. Naturally paleo, vegan, nut-free, grain-free, gluten-free and dairy-free.
- And for a lesser healthy treat, these Ghost Meringues are easy and can even be used to decorate your healthier treats!
- For a different kind of drink, you can try this wonderful Pumpkin Cold Brew with Sweet Cream. It’s definitely a treat to share.
So what kind of desserts are you making for Halloween? I hope you love these bloody witch finger cookies, they’re so fun!
If you make them, I definitely want to see how they turned out! Just snap a pic 📸 and tag #texanerin on Facebook, Instagram or Twitter so I can easily find them.
Photos updated 10/2021. Here’s an old photo from 2012 for the people trying to figure out if this is the recipe they made in the past. :)
Bloody Witch Fingers (easy and without food coloring)

- Prep Time:
- Cook Time:
- Ready in:
- Yield: 60 cookies
Ingredients
- 1 cup butter (226 grams), softened
- 1 cup (115 grams) powdered sugar
- 1/2 cup (100 grams) granulated sugar, highly recommended if you'd like a regularly-sweetened cookie
- 1 large (50 grams, out of shell) egg
- 1 teaspoon almond extract
- 1 teaspoon vanilla extract
- 2 2/3 cups (334 grams) all-purpose flour or white whole wheat flour (or a mix of the two) or for a gluten-free version, see below1
- 3/4 teaspoon salt
- 3/4 cup (105 grams) blanched almonds
- 1/2 - 1 cup (118 - 236ml) strawberry jam
Directions
- In a large mixing bowl, beat together the butter and powdered sugar (and granulated sugar, if using) together until fluffy. Add the egg, almond extract, and vanilla extract and mix. When well combined, add the flour and salt.
- When thoroughly combined, cover with plastic wrap and refrigerate for 40 minutes or up to 2 days.
- Preheat your oven to 325°F (165°C) and line a baking sheet with a piece of paper.
- Take about a fourth of the dough out of the fridge and begin rolling out the fingers. I recommend baking one test finger to begin with. Then you can make sure all the fingers come out the way you want them to. That way you don't spend all your time rolling out all the cookies only to find out that you should have made them thinner or done the wrinkles a different way.
- I rolled them out the thickness of my pink, but a bit longer than my pinky.
- Add an almond to the tip for the fingernail, and press down to make sure it's secure.
- Form a knuckle by squeezing around the middle.
- Use a sharp knife for the wrinkles in the knuckles and vary the length (which I forgot to do myself). That'll create a more realistic finger.
- Place on the prepared cookie sheet, leaving about a centimeter between them. Repeat with the rest of the dough until the cookie sheet is full.
- Bake for 17 - 22 minutes or until slightly golden.
- Let the cookies cool on the sheet, and then remove the almonds from the cookies. Add some jam in the cavities and then put the almonds back, making sure you used enough jam for them to ooze a little. Also, add some jam around the knuckles for extra nastiness. I used about 1/2 cup jam and used the rest as "dip."
- Refrigerate in an airtight container for up to 1 week.
Notes
-
This is the recipe for the gluten-free version:
– 1 cup (225 grams) unsalted butter
– 3/4 cup (150 grams) granulated sugar)
– 1 teaspoon almond extract
– 1 teaspoon vanilla extract
– 3/4 teaspoon salt
- 2 2/3 cups (367 grams) Bob's Red Mill Gluten-free Baking Flour
- 2/3 cup (66 grams) blanched almond flour
In a large mixing bowl, beat together the butter and sugar until light and fluffy.
Beat in the almond + vanilla extracts and salt. Beat in the two flours until thoroughly combined. You'll now have crumbs.
Use your hands to "knead" the dough a bit until it starts to form a dough. Keep mixing until you have a dough. Refrigerate for up to 5 days or start baking, using the above directions.
I didn't need to chill the gluten-free dough. It's important to let these cool completely and sit for about 2 hours before transporting. They're very fragile straight out of the oven.
- If you live in Germany, you need to use half Type 550 for the all-purpose flour and half Type 405 (which is the normal kind you find everywhere). You can get Type 550 at any non-discounter. For the almond extract, I used two vials of Bittermandel Backaroma.
Adapted from Allrecipes
Recipe by Texanerin Baking | www.texanerin.com