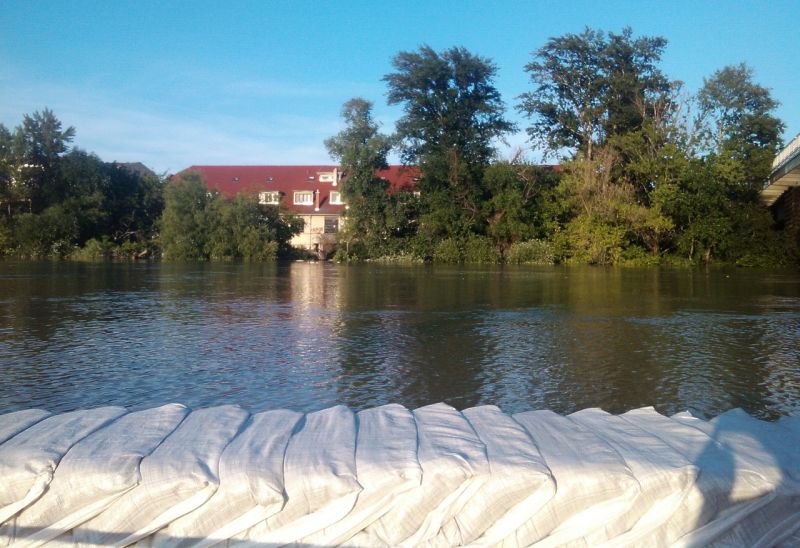
Sandbags are excellent at keeping back flood water, and deserve a spot on every homesteader’s supply list – even if they live far away from the floodplain. They’re really cheap to buy, and have almost as many uses as the often lauded duct tape.
Not only is stockpiling copious amounts of sandbags an extremely inexpensive addition to our preps, they are substantially lightweight when empty and take up only a small amount of storage space.
The uses of sandbags during an emergency survival situation are plenty – if you think outside the box.
If you keep livestock, you may not even have to spend a single dime to garner all of the sandbags that you need.
Livestock feed bags are identical in size and structure as sandbags in most cases. If you open the bags carefully they can be easily either sewn back together at the top of tied with thick twine.
Sandbags do not need to be filled with sand (or only sand) to be of used as I’m about to show you. They can also be filled with dirt and pebbles for most of the uses on this list.
Sandbag Facts
- Commercially manufactured sandbags measure roughly 26 inches long and 14 inches wide.
- When filled with sand, a bag weights approximately 40 pounds (18 kgs).
- A sandbag that is filled and placed outdoors in the elements will typically last around eight months before it begins to deteriorate due to exposure to moisture, water, and sun.
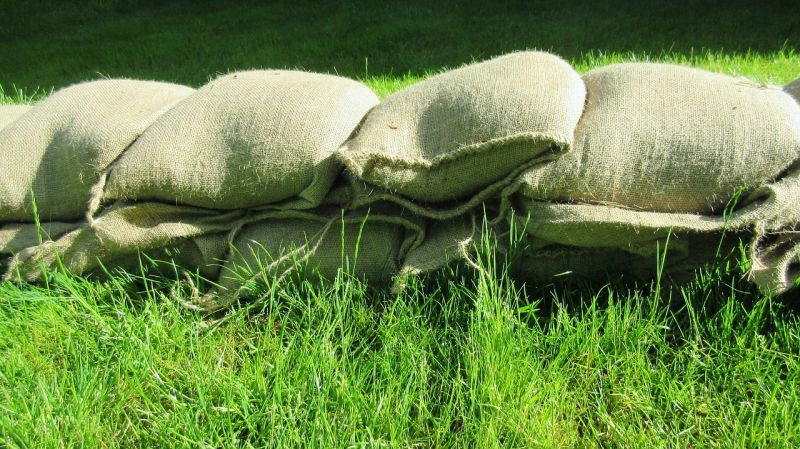
- Modern sandbags are most often constructed or polypropylene, but some are still made out of burlap. The burlap bags are rustically beautiful, but are not as durable when used outdoors.
- Sandbags that are filled with dirt, pebbles, gravel, or concrete are far heavier than those filled with sand, and are advantageous to use for some of the uses on this list.
22 Ways to Use Sandbags around the Homestead
1. To Prevent Soil Erosion and Runoff
Next to flooding, soil erosion protection and prevention are the top ways sandbags are traditionally used.
They can be used to form a retaining wall to prevent hillside slippage, placed along the bank of a creek to prevent it from folding into the water, and even placed directly into the water to help prevent weakening of a bank.
A sandbag wall in a creek to protect a bank must be built at least as tall as the creekbed itself to prevent slippage.
Our 56-acre homestead is a four tiered property. A creek that does flood run near the bottom of our half-mile private farm road, but our home and livestock barn are way up the winding dirt road on the third tier.
You can nearly see the faces of the pilots of helicopters when they fly over – yet we still have need to use sandbags to protect our house from flooding about once a year.
It is the runoff from the fourth tier of our property that causes a problem – it could not be any further away from our sometimes misbehaving creek.
One spring it rained so hard and so long, that the backdoor trail that leads up a steep hill to the fourth tier of the property both looked and sounded like Niagra Falls.
We had two inches of water pouring into our living room and kitchen before several of us grabbed shovels and dug a tributary around the house to divert the water and dug into our sandbag preps.
Living so high up on a hill, you may not think that flooding could ever be an issue, but it was an unusually wet winter followed by record rainfall in the spring – the ground was simply too saturated to allow the neverending falling water to go anywhere but down.
The sand bags can be placed directly into the water, they will not float away. Stack the bags on top of each other tightly to build as solid of a wall as possible. The resulting wall must be at least as tall as the waterway bed or peak of slippage area.
What all of that runoff did to our dirt and steep farm road prompted the tractors and backhoe to come out to fix.
Digging a deeper trench all the way down the road and “training” the runoff where to flow around the house and road with sandbags obstacles prevented the road from being impassable by 4-wheel drive.
While an impassable road will help keep marauders out, it also keeps you in. Any barrier to road passage on our farm road will be man-made by us as we see fit and no longer potentially caused by yet another two year stretch of record rainfall.
2. To Build a Permanent Structure
When sandbags are used to make a shelter they are often referred to as “earthbags.” Bags that are filled with sand, dirt, or a combination of either (alone or with gravel) can build a hardy structure for a fraction of the cost of using wood or cement blocks.
The sandbags can be used both as floors and walls, but not as a roofing material – at least not if they are filled.
To make a roof form for an earthbag structure you will need to pound wood posts, pipe, or stakes are the corners to create a sturdy base for a tarp, metal, or wood roof to be erected upon.
The sandbags can also easily be used to frame a doorway and windows in the earthen structure.
If you are building a permanent structure, like an LP/OP, shed, livestock barn, or sleeping quarters, the temperature inside of the building would benefit from geothermal heating like a more traditionally built earthen home.
If the sandbags will be covered with some other type of material, be it tarps, metal sheeting, or wood, they are better protected from the elements, and will last a lot longer than the predicted 8 months.
Earthen structures that are built beneath ground level like a basement, will last longer still.
To harden the sandbags against the elements, you can mix in 1 part cement to every 10 parts of dirt, sand, or dirt and sand combination being used, and then spray water into the opening of the still unclosed bag.
This can be done before the bag is placed in the desired spot and then carried into place after hardening and closing – making it a lot heavier than 40 pounds – or place the bag in the spot where it is needed and then mix.
If you are using burlap sandbags, place them in the desired spot, close them, and only then add water into the mix by spraying it from top to bottom on the outside.
You can also mix up a bath of Quikrete, and then baste the top, bottom, and sides of a burlap sandbags to help protect it from the elements.
Check out the earthbags building timelapse video below to watch the construction of a structure of this type from start to finish:
3. Emergency Survival Structure
Packing around filled sandbags as part of your everyday carry or vehicle preps is not a realistic idea. But, you can easily pack some lightweight and folded sandbags in a bugout bag or your vehicle, along with a folding shovel, for use during a survival situation.
When needed, you could dig up some dirt to fill the bags, and use them as insulation when sleeping beneath a tarp style tent or to surround you body with when curled up in a sleeping bag or Mylar emergency blanket.
The filled sandbags could also be placed around the exterior of a tent to provide more insulation, to sturdy up the tent during a storm, and to offer at least a little bit more protection from two and four legged predators.
4. Vehicle Traction
Keep empty sandbags in your vehicles, along with a folding shovel, so they can be quickly filled with dirt or gravel and placed under tires to provide traction.
Remember to tie the bag securely closed and only fill the bag so that when it lays flat a narrow layer of natural material is present – one that the tire can roll over without causing the vehicle to struggle and slide more while still stuck in the mud.
5. Ballistic Barrier
Filled sandbags make an excellent and cheap backstop for use in building a home gun or archery range.
They can also be used to make a SHTF barrier around your home entrances and windows to better protect them from a home invasion.
Building an open top bunker, or semi-underground structure to use as a shooting blind can allow you to place a family member in key locations around your survival homestead for watch patrols, as well as during an attack.
Sandbags being used as a ballistic barriers must be stacked multiple layers thick to prevent rounds of even a small caliber from going through them.
When a round fired from a gun goes through a sandbag, the thickly packed natural material inside will both slow down the bullet and alters its direction.
6. Portable Gardening
You can make your survival garden portable or turn a permanent growing area into one that requires a whole lot less weeding.
Simply fill a sandbag with quality dirt and lay it down in the growing spot with a broadside exposed.
Cut open the middle of the bag from two to three inches from the bottom to the same distance on the sealed top. Make sure not to cut it too close to the top of the sides, or it will tear.
Sand bags are deep and long enough to serve as excellent planters for lettuce, garlic, kale, onions, carrots, cabbage, and most herb varieties.
7. Tarp Making
Large tarps are a bit pricey and there a ton of uses for tarps on a prepper retreat. You can cut apart livestock bags and commercially manufactured sandbags, and sew them together on a typical home sewing machine with quilting or upholstery thread.
Uses for Sandbags as Tarps
- Privacy fencing.
- Sun shade for outdoor work.
- Attach to posts or trees, and use as a tent (with an additional layer of sewn together empty of filled sandbags for use as a floor).
- As tent patching for commercially manufactured tents.
- Lay out flat on the ground, and use as a sun drying area for herbs or nuts.
- As a chicken run cover to protect them from the elements or to create extra living space as your flock grows and the coop becomes too crowded.
- To patch roof leaks.
- To fill with stuffing (dirt, old clothes, etc.) and use as a mattress.
- To use as garden fencing to keep deer and rabbits out of your growing vegetables.
- To tack to the sides of livestock barns, pens, and hutches to insulate the animals from a harsh winter.
8. Insulation
During a SHTF situation, do not expect the power grid to last for very long – regardless of the type of inciting event.
If your home is not already set up to go off grid for heat, filling sandbags and stacking them alongside exterior walls around the entire perimeter of the house will help keep it warm during the cold weather months and cooler during the summer -similar to an earth berm home.
9. Livestock Water
During the winter months it is not unusual for livestock waterers to freeze – and even crack if they are made of plastic. When this type of frustrating situation happens, your pond and even creek are likely also frozen.
Packing water to livestock multiple times per day – if the faucet is even still running, is not a pleasant chore – I know this from experience.
You can place a sandbag under the waterer and around it as tall as its sides, to better protect the water from freezing. In my experience, this usually works until it gets below zero.
You can also cut apart several sandbags and then sew them back together so they resemble a huge cushion.
Cut open the top in the same manner as noted above in the gardening section. Place the waterer inside of the sandbag, and then fill in around it with sand and dirt to insulate it even further.
10. Traffic Barricade
If you want to block off your driveway – or even a road, fill sandbags and use them as an entrance barrier.
A determined group of people – or even a single person who has enough time before detection, can move the bags, but this will not be an easy or quick process – buying you time to become aware of the security breach and deal with it.
11. Water Collection And Filtration
Fold a clean and empty sandbag into a bladder shape, then use it to pack water. This will only work a short distance before the water starts to seep through.
The same bag can be used as an emergency water filter screen to help remove dirt and debris from water.
12. Foraging Sling or Sack
Cut several sandbags apart, then tie or sew them back together to make a sling for carrying or dragging large game out of the wood or to make multiple small sacks for small game as well as wild edible foraging.
13. Tripwire and Fishing Line
Cut the strings out of the top of the sandbag or livestock feed bag and use the sturdy twine like material to make tripwires or to makeshift fishing line.
14. Bugout Bag Patching And Weather Protection
Cut some sandbags into 4 X 4 inch squares, and put them in your bugout bag along with a sewing kit to uses as patching for tears in the bag itself or outerwear.
A sandbag can be cut apart and draped and tied over a bugout bag to give it more protection from the elements.
15. Storing And Ripening Food
Use a whole or cut in half and sewn back together sandbag to store garden produce or to place unripened fruits inside to help them soak up their ethylene gas and ripen so they are safe and good to eat.
16. SHTF Off Grid Communication
Cut a sandbag into several wide and long strips so they can be tied to trees, posts, or anything along your path to use as trail markers and to leave coded messages for family and mutual assistance group (MAG) members.
17. First Aid
Cut clean sandbags into varying stripes so they can be used as bandages, ice holders, to make splints, and as tourniquets during an emergency survival situation.
18. Seat Cushions And Pillows
Stuff sandbags with natural material or fabric of any type to make seat cushions and pillows.
The sandbags can also be tied or hand sewn onto a wood frame for a sling chair, or to repair outdoor folding chairs.
19. Camo Shield
Make your own SHTF ghillie suit by spraying the sandbags with camo color spray paint and sewing them into a suit or into sections that can be sewn onto pants and shirts to makeshift a suit to obscure your form from view in the woods.
The camo sandbags can also be used to hide your bugout bags and other belongings when you are on a bugout or forced to stop and rest while trying to get home on foot during an emergency situation.
20. Tactical Targets And Training Dummies
Make some dirt cheap archery, knife, and gun targets and hanging tactical dummies that swing for survival training drills.
21. Animal Traps
Hide a deadfall or any type of pit trap from prey by covering it with a sandbag tarp that has been painted in camo colors – with leaves thrown across it so it blends in with the forest floor.
22. As Weights
You can use a whole sandbag that is filled to varying levels or cut into smaller sections and sewn together and filled to make nearly free weights for working out as a part of your survival fitness routine.
Filled sandbags also make create counterweights for animal traps and construction projects.
Wrap-Up
A case of 100 sandbags typically cost no more than $15, so rest assured this is aworthwhile investment.
Always store sandbags in a cool and dark place that is not subjected to moisture or too much humidity to prevent them from rotting – this is even more important when burlap sandbags are being used.